After about 6 years, my Linksys WRT54G finally packed it in, so I went out and bought myself a Linksys E4200 dual band wireless-N router. I have several laptop computers and a media player that have wireless-N adapters, so the new router will be a welcome change.
Besides the added benefit of being able to connect using the 802.11n standard, the Linksys E4200 wireless router has a few additional features that were available on my previous wireless router. After I got the router up and running, I began to explore some of the additional features to see how well they worked. Considering this is one of Cisco’s top performance home wireless routers, I expected big things from it.
Setting Up the Linksys E4200 Wireless Router
The package contents were basically the standard items: the Linksys E4200 wireless router, a power cable, a network cable, and a CD containing the Cisco Connect software. I haven’t used any software that came with any of my routers in the past, so I really couldn’t see myself using this one. Although I may explore the software in the near future, for reasons you will read later.
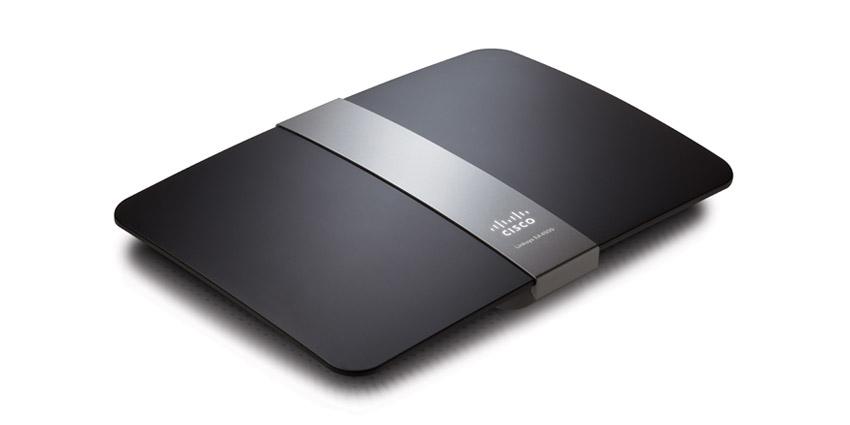
The router itself is smaller than my previous WRT54G router. While the width and length is about the same, the Linksys E4200 is slimmer, and there are no antennae sticking out from the top. This means that when I reach behind my desktop, I don’t have to worry about knocking into them.
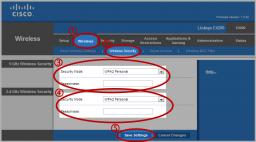
The setup of the router was pretty straight forward, and I set it up manually as I usually do. I basically logged into the router’s dashboard through my Web browser and configured the security settings for the wireless network.
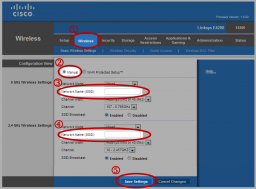
The dashboard, while it has change slightly from the WRT54G, basically looks the same, which made it easy for me to find my way around. The biggest change that I say while I configured my wireless network was the fact that you can create two separate wireless networks – one for 5 GHz, and a second for 2.4 GHz. Since this router is dual-band, devices can connect to the router on either frequency at the same time.
Since I only wanted to manage one network, I changed the settings for both the 5 GHz and 2.4 GHz bands to be identical. Doing this didn’t cause a problem, and I was able to connect both wireless-N and wireless-G devices to the different frequencies without any problems.
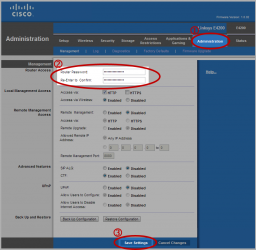
The one thing that bothers me about the Linksys routers is the inability to change the dashboard user ID. You can change the password easily, but the actual user ID you use to log into the dashboard can’t be changed from being blank. I have seen other routers that provide this ability, and I hope that Cisco will change this for future routers.
Router Performance
So far, I have been pleased with the speed of the router. I have a hard-wired desktop connected directly into the Linksys E4200 router, and it seems faster when downloading from the Internet. Although I haven’t done an actual speed test, the computer seems more responsive overall.
A wireless-N laptop connects to the router at faster than the 54 Mps rating of a wireless-G connection. Although, the one aspect that I am disappointed with is the range the router has. From the opposite side of the house, the laptop connects with 3 out of 5 bars within Windows 7. The WRT54G router connected with the same number of bars, so there really isn’t an improvement in the connection range with the Linksys E4200. I am a little disappointed in this as I thought I would have a better connection to the router, and because of this I my connection speed is 74 Mbps. This is still better, however, than what I would have received from the WRT54G at 5 bars.
Linksys E4200 External Hard Drive Connection
The Linksys E4200 wireless router includes a USB port on the back next to the ethernet ports. This allows you to connect an external hard drive to the router and then share the data on the hard drive to the computers that are connected to the router.
While this is a huge selling point for me, it was a nice feature that I was looking forward to trying. As I don’t have a NAS (network attached storage) device, having the Linksys E4200 router and my external hard drive act as one was a nice bonus.
After setting up my router, I connected an external hard drive into the router and the router immediately identified the drive. I was able to setup user IDs and shares for the hard drive so I could connect to the hard drive from other computers. When I tried to map to a share on the hard drive, my desktop couldn’t connect to the share. I also tried to connect to the share from a laptop, and it, too, couldn’t connect. I decided to wait a few days and try again.
The next time I tried, the Linksys E4200 wireless router couldn’t even detect the external hard drive, so I couldn’t even manage the shares. I unplugged the hard drive and plugged it back into the router, but the router still couldn’t find the hard drive.
I saw read about a few people online that have also had this issue, so it appears to be a common problem. With the latest firmware update, you can also connect a printer to the router using the same USB port. I haven’t tried this, and from what I have read, you need to use the Cisco Connect software to get the printer sharing to work.
Linksys E4200 – Pros
- Dual band (2.4 and 5 Ghz) that allows you to connect to either band to avoid interference.
- Ability to setup a separate network for each band.
- Easy to configure – dashboard very similar to previous Linksys routers.
- Connected to my ISP without any problems.
- Connected wireless-G and wireless-N devices without any problems.
- Lower profile – no antennae sticking out from the top.
Linksys E4200 – Cons
- No ability to change the router’s user ID.
- The range isn’t much better than my 6 year old router.
- Couldn’t get an external hard drive to connect to the router.
With the exception of the external hard drive issue, I find the Linksys E4200 wireless router to be a good router. I was disappointed in the range of the router, but I do like the dual-band feature, and I had no issues with connecting any device to the router. If you can get the Linksys E4200 wireless router for a good price, I suggest you pick one up.


