Category: Security

Security is an important topic when it comes to technology. There are many different areas of security, so this category is divided into various sub-categories to help navigate through the posts on security.

  • Wireless Security: WEP and WPA

    I have written several posts with regards to securing your wireless network connection. In many of those posts I have talked about choosing WPA over WEP, and briefly explained why I do that. In a post titled Network Glossary of Terms I provided a simple definition for both security protocols.

    I have decided to expand on those definitions by providing a more information post about WEP and WPA. Hopefully, this post will help you better understand how a wireless network is secure.

    (more…)

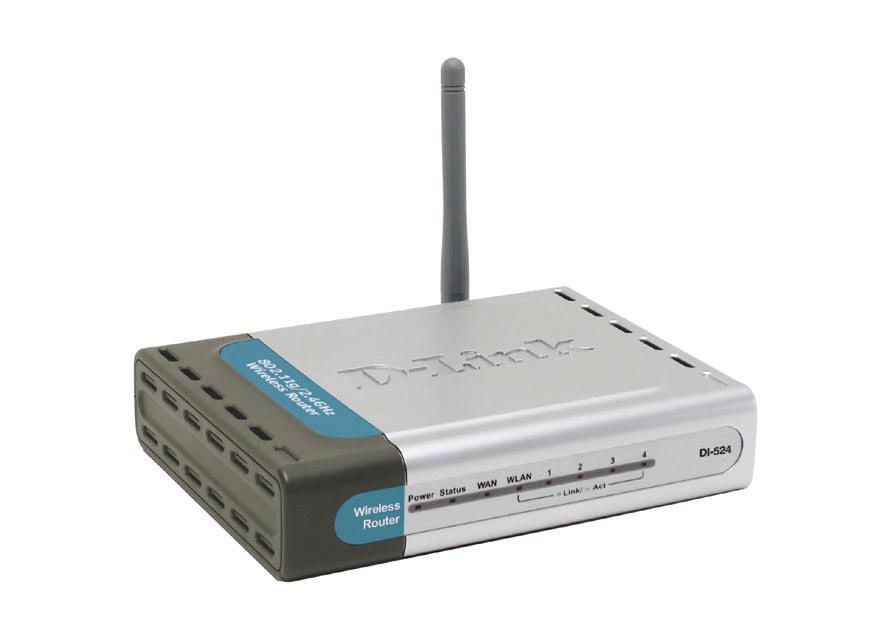
  • Securing the D-link DI-524 Wireless Router

    Securing the D-link DI-524 Wireless Router

    I recently created a post titled Securing Linksys WRT54G Wireless-G router in which I provided step-by-step instructions on securing the WRT54G router. The Linksys WRT54G Wireless-G router is a popular router, but it isn’t the only one on the market. In this post I will discuss how to secure another wireless router, the D-Link DI-524.

    Note:

    If you are having trouble with the administrative pages for the router, try using the Internet Explorer Web browser. The administrative Web pages for the router seem to work better in Internet Explorer.

    Securing Your Wireless Router

    Note:

    If you need to reset your router back to the factory defaults, then please read How to Reset the D-Link DI-524 Wireless Router.

    To secure your D-Link DI-524 wireless router, follow these steps:

    1. Open your Internet browser and enter the following in the address bar: http://192.168.0.1.
    2. Note:

      If you have changed the IP address of your wireless router, enter that into the address bar. By default, the address is 192.168.0.1.

    3. Enter the user ID and password for your router. If you haven’t changed it, the default user ID is “admin” and the password is “blank”. We will change it later if you haven’t already changed it.
    4. We will first change the administrative password. First click the “Tools” tab at the top of the page. The “Admin” page should be displayed.
    5. Within the “Administrator Settings” on the right, enter a new password for the administrator beside “New Password” and then again beside “Confirm Password”.
    6. Click “Apply” at the bottom of the page. The next time you access the administrative options, you will need to enter the new password with the “admin” user ID.
    7. Next, click the “Home” tab, and then select “DHCP” on the right. The “DHCP Server” Web page should now be displayed.
    8. We will now limit the number of IP addresses assigned by your wireless router. Count the number of computers that will connect to the router, and change the “Ending IP Address” to allow that many computers to connect.
    9. For example, if you have three computers that need to connect to your wireless router, enter “102” into the text box. The first computer will get the IP address 192.168.0.100, the second 192.168.101 and the third 192.168.0.102.

    10. Click “Apply” at the bottom to save your changes.
    11. Now we will secure you wireless connection to prevent others from connecting. Under the “Home” tab, click the “Wireless” option from the left.
    12. Beside the “SSID” option, enter the name for your wireless network connection.
    13. This is where the steps are different depending on which revision of the DI-524 you are using. Beside “Security”, if you see “WPA-PSK”, then you should select that option, and then go to step 14. If you see a dropdown list, select “WPA”. If you can’t connect using “WPA”, then select “WEP”. Using “WPA” will provide a much more secure connection that using “WEP”. For more information about WEP and WPA please read Wireless Security: WEP and WPA.
    14. Click “AES” beside the “Cypher Type”.
    15. Make sure “PSK” is selected beside “PSK/EAP”.
    16. Now you must get very creative. Specify a long “Passphrase” with a mix of upper and lower case letters, numbers and punctuation. Once again, please read Creating Secure Passwords for tips on how to do this. In this case the longer the better.
    17. Make sure you write down this key somewhere, either on a piece of paper or in a text document on your computer. You will need this information when you connect to your wireless network.

    18. Enter your passphrase next to “Passphrase” and again beside Confirmed Passphrase.
    19. Click Apply to save your security settings.
    20. Now you are all done securing your wireless router and network. All you need to do is connect to your network, and enter your “Passphrase” exactly as you specified it. I won’t go into detail on how to connect to your wireless network, as I will save that for another post.

    Wireless Router Security Connection Questions

    How come we didn’t disable the SSID broadcast? Won’t that help with securing my wireless connection?
    It has been mentioned many times that disabling your SSID broadcast will help secure your network. The reality is that those who attempt to get into your wireless network will be able to easily pick up or SSID whether it is broadcasted or not. You may also have problems connecting to your wireless router if you disable the broadcasting of your SSID. I keep it enabled.
    Question: Why do you specify to use WPA – Personal first, and not WEP?
    The reason is that WPA is much more secure than WEP, and therefore you should use that security mode over WEP. An experienced hacker can easily crack WEP encryption so it doesn’t provide as strong security as WPA. If you can’t use WPA, use WEP because it is still better than nothing.

    Summary

    This post provided step-by-step instructions on securing your D-Link DI-524 wireless router. After following the steps, you should now be confident knowing that you have a secure wireless Internet connection.

  • Securing the Linksys WRT54G Wireless-G Router

    Securing the Linksys WRT54G Wireless-G Router

    I discussed establishing good wireless network security in a post titled Securing a Wireless Network, but now I will discuss securing the Linksys WRT54G wireless-G router. I currently have a Linksys WRT54G Wireless-G router. When I work from home I use this router to connect to work through VPN, and have done it without any problems. It has made a great cable router for my broadband connection.

    The big issue with wireless networks is security. As anyone with a wireless network card within a few hundred feet of your router can connect to your router. To prevent this from happening, it is important to secure your router.

    Securing the Linksys WRT54G Wireless-G Router

    Note:

    If you need to reset your router back to the factory defaults, then please read How to Reset the Linksys WRT54G Wireless-G Router.

    To secure your Linksys WRT54G wireless router, follow these steps:

    1. Open your Internet browser and enter the following in the address bar: http://192.168.1.1.
    2. Note:

      If you have changed the IP address of your wireless router, enter that into the address bar. By default, the address is 192.168.1.1.

    3. Enter the user ID and password for your router. If you haven’t changed it, the default password is “admin”. We will change it later if you haven’t already changed it.
    4. You should now see the “Basic Setup” Web page display in your browser. Scroll down the page until you see “Maximum Number of DHCP Users”.
    5. This option will assign a specific number of IP address to computers. If more than this number of computers tries to connect to your router, they will not be able to.

    6. Count the number of computers that will connect to the router, and type it into the “Maximum Number of DHCP Users textbox”.
    7. Scroll down to the bottom of the Web page and click “Save Settings”. Once the settings have been saved, click “Continue” to return to the Web page.
    8. At the top of the Web page, click the “Administration” option in the menu bar.
    9. On the “Management” Web page, you should see two password text boxes. This is where you should change your administrative password. Type in a new secure password into both boxes. If you need help creating a secure password, please read Creating Secure Passwords.
    10. Once you have changed your password, click “Save Settings” at the bottom of the Web page.
    11. You may be prompted to login again, if you are then enter you new password in the password field.
    12. Navigate back to the “Management” Web page by clicking the “Administrative” option in the menu.
    13. We will now encrypt your connection to your router setup from your computer. To do this click the “HTTPS” checkbox next to the “Access Server” option.
    14. Once again, click the “Save Settings” button at the bottom of the Web page.
    15. You won’t get the settings saved page again because the URL in the address bar is not longer correct. Since you have changed your connection to HTTPS, it you need to specify that in the address when you connect to the router setup.

    16. In your browser, change the address to: https://192.168.1.1.
    17. If you get a security error, ignore the error and continue to the Web page.

    18. Login with your password and then click the “Wireless” menu option.
    19. Beside the “Wireless Network Name (SSID)” option, type in a name for you network connection.
    20. Click the “Save Settings” button and the “Continue” button to return to the “Basic Wireless Settings” page.
    21. Click the “Wireless Security” sub-menu option at the top of the page. This is where we will provide the most important security setting.
    22. Next to “Security Mode”, select “WPA – Personal” from the drop-down list. If you have trouble connecting to your wireless connection, you can try selecting “WEP”, but your connection will be much less secure. For more information about WEP and WPA please read Wireless Security: WEP and WPA.
    23. Next to “WPA Algorithms”, select “AES”. Once again if you have trouble connecting to your wireless router, select “TKIP”.
    24. Now you must get very creative. Specify a long “WPA Shared Key” with a mix of upper and lower case letters, numbers and punctuation. Once again, please read Creating Secure Passwords for tips on how to do this. In this case the longer the better.
    25. Make sure you write down this key somewhere, either on a piece of paper or in a text document on your computer. You will need this information when you connect to your wireless network.

    26. Click the “Save Settings” button at the bottom of the Web page, and then the “Continue” button.

    Now you are all done securing your wireless router and network. All you need to do is connect to your network, and enter your “WPA Shared Key” exactly as you specified it. I won’t go into detail on how to connect to your wireless network, as I will save that for another post.

    Wireless Router Security Connection Questions

    Question: How come we didn’t disable the SSID broadcast? Won’t that help with securing my wireless connection?

    Answer: It has been mentioned many times that disabling your SSID broadcast will help secure your network. The reality is that those who attempt to get into your wireless network will be able to easily pick up or SSID whether it is broadcasted or not.

    You may also have problems connecting to your wireless router if you disable the broadcasting of your SSID. I keep it enabled.

    Question: Why don’t you filter who connects to your wireless router using the MAC address by turning on MAC address filtering?

    Answer: This is another tip you may see on the Internet about securing your wireless network. There are a few problems with turning on the MAC address filtering.

    The first problem is that a hacker can easily spoof a MAC address, and therefore bypass the MAC filtering. The second is that you need to manage the MAC addresses of all network cards attempting to connect to your router. Since it really doesn’t provide a lot of security, it is just easier to keep it turned off.

    Question: Why do you specify to use WPA – Personal first, and not WEP?

    Answer: The reason is that WPA is much more secure than WEP, and therefore you should use that security mode over WEP. An experienced hacker can easily crack WEP encryption so it doesn’t provide as strong security as WPA. If you can’t use WPA, use WEP because it is still better than nothing.

    After following the steps, you should now be confident knowing that you have established a good wireless network security which provides a secure Internet connection through your Linksys WRT54G Wireless-G router.

  • How Encryption Works

    Everyday there are possibly millions of transactions made that involve the exchange of personal information. Obviously, those that provide that information would like to know that the information they send is safe and secure. On the Internet making information secure is handled by encrypting the data before it is sent, and decrypting it once it reaches its destination.

    This post will describe the encryption process and how it is used to keep information safe.

    Definition of Encryption

    Encryption is the process of encoding data to ensure that unauthorized parties cannot view it. When data is encrypted, the data is first passed through an algorithm and is converted into cyphertext, which is the encrypted data. To accomplish the encryption, a key or code provided by you is used to encrypt the data, which will make the encryption difficult to crack.

    There are two systems used for encryption: Symmetric-key encryption and Public-key encryption (asymmetric). The next section will discuss the two systems.

    Encryption Systems

    A symmetric-key encryption system uses a secret key or code to encode the data. When the information is passed to another computer, the code is passed along separately. The second computer then uses the secret code to decode the data. A symmetric-key system is fast but is not as secure as the public-key system. If someone were to intercept the data and the code, then they could easily decode the data.

    In a public-key system there are two keys: a public key and a private key. A public key is given out by a secured computer to any computer that wants to establish a secure communication. When the data is to passed from the client’s computer, it is first encoded with the public key and then sent to the secured computer. The secured computer then uses the private key along with the public key to decode the data.

    Number of Public Keys

    So how many keys are possible for encryption? It all depends on the bit strength of the encryption. The bit strength of the encryption can vary such as 40-bit or 128-bit. To get the number of keys, simply raise 2 to the power of the bit strength. For example, for 128-bit encryption the number of possible keys is 2128 or 340,282,366,920,938,000,000,000,000,000,000,000,000 keys.

    Although it may look like determining the correct key is impossible, just remember that computers are getting more powerful, so it is taking less time to determine the key through brute force. This is not to say that your data is not secure, as it still takes a long time to crack 128-bit encryption, at least to the point where it may not be worth while.

  • Backing Up Digital Photos

    There is much discussion on the Internet about the best method for backing up digital photos. Some say CD/DVDs are the best media, while others prefer hard drives or tapes. In my opinion there is no right way to back up digital photos as each method has its advantages and disadvantages. I will discuss the various media and their advantages and disavantages in this post, and then discuss the method I use to back up my digital photos.

    Optical Media (CD/DVD)

    CD/DVDs are perhaps the most popular method for backing up digital photos, as most computers now come with a burner and software. Most photo organizing software also include the ability to burn your photos to a CD/DVD.

    Advantages: Very little cost to storing your digital photos, as your computer probably includes a burner. You can buy CD/DVD spindles that include hundreds of blank discs for a few dollars. A single layer, single-sided DVD can hold up to 4.7GB, which means you can store thousands of photos on a single DVD.

    Disadvantages: The biggest and possibly most talked about problem with optical media is that they could develop problems as time passes. This could lead to you digital photos becoming unreadable. To help minimize read problems in the future, only buy name brand CD/DVDs.

    Another disadvantage with CD/DVDs is the fact that they are a progressing technology. This means that in a few years they will be replaced by another form of optical media. For example, the CD is now being replaced buy the DVD, which in turn is slowly being replaced by high-definition DVDs. This means that you will have to eventually move your backups to the next generation of optical media every few years.

    Hard Drives

    Hard drives can store enormous amounts of information, much more than either tapes or CD/DVDs. All computers come with at least one built-in hard drive so you don’t need to buy anything else. An external hard drive, however, is preferred for backing up data.

    Advantages: As mentioned they have massive amount of storage capacity, meaning one hard drive can probably store your entire digital photo collection. You would only have to purchase the drive and no additional media. An external hard drive is very common today, and can connect to your computer through the USB port. This keeps your data safe in case your computer fails and you need to reinstall your operating system. Unlike the other media, hard drives have been around for many years, and although the technology may change, you will still be able to use your current hard drive for many years.

    Disadvantages: The biggest problem that you can run into would be a hard drive failure. Always keep in mind that anything with moving parts can break, and a hard drive is no exception. If you take care of your hard drive, then it should last for many years.

    Magnetic Media (Tape)

    This is not as popular for a home user as it is for a business user. Tapes are popular for a business since they can store much more than a CD or DVD, and they are more reliable.

    Advantages: Tapes, as mentioned, can store a large amount of data, although not as much as a hard drive. Not only can they store a lot of data, but they can also be erased and rewritten many times. If you take care of your tape, then it can last for many years.

    Disadvantages: Out of the media mentioned in this post, tape backup is probably the most expensive. You would need to buy a tape drive, and then the individual tapes, and depending on the type you buy it can be quite expensive. This is one of the reasons tapes or used more in business than at home. Tapes can also degrade if used on a frequent basis, which could cause problems with your data, so just like the other media you will need to take care of your tapes.

    Online

    This type of backup isn’t discussed as frequently because most don’t think about using an online service to store their data. There are many places online that can provide you with enough disk space for your entire digital photo collection, but you will need to research the best Web site that suits your needs.

    Advantages: One of the biggest advantages is that you don’t need to worry about resaving your data as technology progresses. Your chosen online company will do that for you. Another advantage is that the online company probably has a good backup and restore system in place in case of a hardware problem (at least you hope). This will help ensure that you never lose your data.

    Disadvantages: You will probably need to pay a monthly fee to store your data on the servers, and depending on your budget, this may not work for you. You will also need to do much research into the online company first to ensure that your data is safe and secure. The last thing you need is to see your digital photos all over the Internet because someone accessed your backups.

    My Method for Backing Up

    After reading this post, you may be wondering how I choose to back up my digital photos. Here is what I do:

    1. First I copy the digital photos to an external hard drive. I use a Western Digital 250GB hard drive which has more than enough storage space for my needs. This also allows me to pull up the pictures at anytime without having to find a DVD first.
    2. I then backup the same photos to a DVD (usually one for each year). This allows me to keep my digital photos off site in case something happens.
    3. I also maintain my collection of digital photos on an online Web site. This provides extra protection for my photos.

    As you can see I don’t stick with one method of backing up my digital photos. The best thing you can do when backing up your photos is to make multiple copies. This way if one copy doesn’t work, you have another.

    Summary

    I discussed the various media that you can use to back up your digital photos. I have also described the method I use to backup my photos. After reading this post, I hope that you will be able to choose your preferred method to keep your photos safe for many years. Remember: always make multiple copies of your data.
  • How To Keep Your Computer Running Smoothly

    In my post titled Protecting Your Computer From Viruses and Spyware I outline several points that you should follow to ensure your computer is problem free. I decided to list the tools that I have used, as well as provide a simple schedule you can follow to ensure your computer runs smoothly.

    Note: I do realize that there are many more applications than the ones listed, however, I have listed the ones that I have used in the past.

    Anti-Virus

    These tools are used to detect and remove viruses that have infected a computer. They can be scheduled to run a scan of your computer at a specific time, or a scan can be manually run at any time. All anti-virus software should be updated on a regular basis to ensure any new viruses can be detected. Most, if not all, of the software tools listed here can be set to automatically check and download updates. Also, ensure that only one anti-virus tool is installed, as more than one can cause problems.

    Anti-Spyware

    Spyware is a major cause of computer problems, including slow-downs, processor usage and application crashes. Some of the spyware can be very dangerous to have on your computer as they can also send information from your computer over the Internet. Along with anti-virus software you should also install anti-spyware software to help keep your computer clean. Unlike anti-virus software, you can install many anti-spyware applications on you computer. I encourage you to do so as one application may not clean all spyware from your computer.

    Software Firewall

    The software in this category is becoming more important, especially now with always-on broadband Internet connections. Software firewalls are your last line of defence to your computer from the Internet, and the first line from your computer to the Internet. They are used to keep the viruses and spyware from getting in your computer, and if they do get in, prevent them from sending information out to the Internet.

    Defrag Utilities

    Fragmentation can be a problem if you install and uninstall applications, or simply add and delete files. When a file is removed from a computer, and another file is added, then it may fill up the space used by the deleted file. If the new file is larger than the previous, then it may be split into parts and stored throughout your hard drive. This means that your computer will have to look in different places on your hard drive to read the entire file. Defragging a hard drive will put all the pieces of a file next to each other so your computer doesn’t have to spend time retrieving the entire file.

    • Windows defrag (included with Windows)
    • Diskeeper (http://www.diskeeper.com)
    • PerfectDisk (http://www.raxco.com/products/perfectdisk2k)
    • JkDefrag (free) (http://www.kessels.com/JkDefrag)

    Scheduling and Updating

    To assist with maintaining your computer, you should perform the following tasks at the suggested time.

    Application Type Schedule
    Anti-virus Weekly
    Anti-spyware

    Weekly
    Defrag Monthly

    It is important that you keep your anti-virus and anti-spyware applications up to date. To make is easier for you, you may be able to have the applications automatically download the updates for you, or have them download the updates when starting the application.

    Along with the anti-virus and anti-spyware applications, it is also important to ensure you have all the latest security updates for your operating system.

  • Protecting Your Computer From Viruses and Spyware

    Security has become a huge concern for many users, especially if you are online on a frequent basis. It is important to ensure that your computer is as secure as possible to prevent unauthorized users from poking around in your computer.

    (more…)

  • Securing a Wireless Network

    Securing a Wireless Network

    I use both a wired and wireless network at home. I am fortunate enough to have an Internet Service Provider (ISP) that provides up to three IP addresses. I connected a switch to my modem, and two routers (one wired, and the other wireless) to the switch. Each router has a separate IP address from my ISP. My desktop is connected to the wired router, while two laptops connect to the wireless one. I can connect either laptop to the wired router with a network cable if I choose to as well.

    (more…)