Category: Digital Photography

All posts relating to digital photography, including both hardware and software. Tutorials and reviews are the most common types of posts.

  • VideoProc – Not Only The Best MKV to MP4 Converter, Also All-in-One Video Processing Software!

    VideoProc – Not Only The Best MKV to MP4 Converter, Also All-in-One Video Processing Software!

    The digital age is here and so is the time of a digital transformation. There is a lot of content available (both online and offline) be it audios or videos, tons of formats to choose from, different requirements and different options to finalize amongst. For example: Back in the day, you used to have just black and white videos. Now, even in the category of colour videos, there is HD, 4K, 720p, 1080p and MKV as formats available.

    However, with so many formats, there is always a limitation. Not every device that you use will support every format that you have your video in.

    Take a look at the most trendy MKV format of videos, it is not supported by many media players and most Apple devices like Mac, iPhone and iPad. MKV files being extremely large due to their huge database of audio, subtitles and video, it becomes difficult to find an alternative when it fails to work on a device.

    Hence, the best way out? It is to convert MKV to MP4 file and then use it on your laptop or mobile phone. In fact, you don’t need to be a professional editor of spend loads of money in buying a professional software like Adobe Premiere, you could just trust VideoProc.

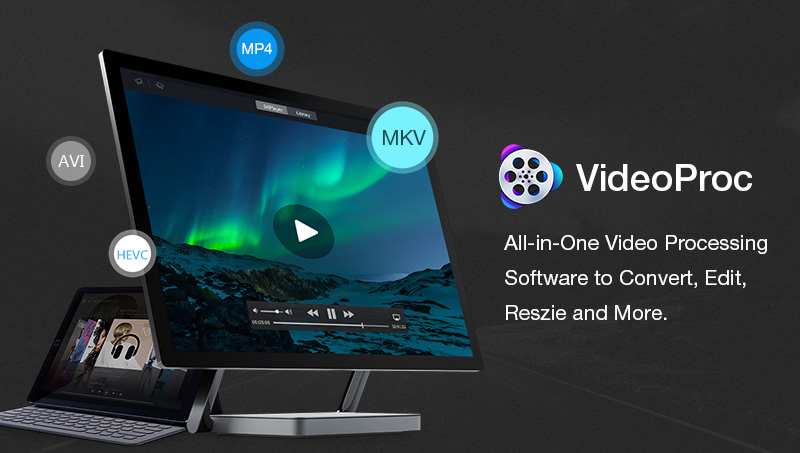
    VideoProc is an editing software available that not only convert MKV to MP4 format easily but also provides tons of additional features to ensure smooth usage.

    1. Smooth as glass conversion. Not only converting videos between just MKV and MP4 formats, VideoProc works to provides options between around 370 input codes and 420+ output styles. In case of the time to edit MKV and other large videos, it compresses the size also without harming the video, just the pixel-level quality changes slightly. It supports UHD files, works smoothly while uploading large files and has a vast catalogue of choices for any user to choose from.
    2. Enhancing the experience with GPU acceleration. VideoProc is a rare find, an editing software which is not as expensive as professional editing softwares but provides a full GPU acceleration for a user. It used Intel QSV, NVIDA, AMD and processes videos at around 47x times, making work easy. This is the reason why videos get processed really fast on the VideoProc platform whereas the quality also does not get damaged, be it for 4K videos, MKV to MP4 videos or others.
    3. Finding the best support with all-round features. In addition to all the above features, VideoProc works to provide an all-round experience with basic editing features like cut, overturn, colour settings etc and even professional ones like merge, convert etc to its users. It works to have No. 1 fast processing speed where it can convert even old videos or DVD files to modern day video formats. It can be used to record your webcam videos, computer screens or download content from UGG websites. Everything in one place.

    Here’s a visual tour of Converting MKV to MP4 with VideoProc:

    As a customer, if you have the following criteria in your books for use or need of a video editing software, VideoProc is the way to go.

    1. Lightweight and easy to use.
    2. High-speed processing.
    3. Supports both Windows and Mac.
    4. User-friendly and highly stable.
    5. Extensive features.
    6. Not very professional or high-end.

    VideoProc ticks all these boxes and provides an editing experience which isn’t available everywhere these days.

    A few more features of VideoProc are:

    1. Quantity and quality. While it does not reduce or harm the quality of your footage, it provides options to remove noise, remove fisheye, stabilize shaky footage or clips in videos and add watermarks.
    2. GoPro editing. GoPro videos are a different ball game altogether as compared to any other normal video. Being 4K, slow-motion or superview videos, VideoProc works as an easy option to edit them. In fact, in most cases if you have travel videos that you want to share on YouTube, VideoProc is where you can Transcode 4K HEVC so that there are no problems during social media sharing.
    3. Not just restricted to videos. VideoProc can also work easily with Audio files. Formats like MP3, AMR, WAV and FLAC can be easily used on the platform, converted, edited or extracted. Top-notch quality of 5.1 surround sound and extraction features, audios are simple with VideoProc.

    All these features and a simple 3-step basic way to convert MKV to MP4, VideoProc has it all. Uploading a file, changing the format and then running it, that is all it takes to convert files on VideoProc.

    Moreover, it has a special giveaway and Black Friday offer for users who wish to gain VideoProc Lifetime license going on, again saving you money with everything else that it provides.
  • Manage Photos on Mac Easily

    Manage Photos on Mac Easily

    Apple makes it easy to manage your photos on any device, be it your Mac laptop, desktop, or a mobile device thanks to the versatile iCloud Photo Library. It saves every photo you take and showcases it on every device unless you delete it permanently. So if you modify your photo, the changes are broadcast to all other devices you own.

    The new images are uploaded to the cloud each time your device gets online via Wi-Fi or is connected to a charger, but of course the speed of updates greatly depends on your local broadband connection.

    Your photos are stored in categories such as Moments, Collections, People and Years. This helps you quickly find a person across your whole image database or choose a specific period of time.

    By default, your photo library is categorized by Memories, People, Places and Imports. You can also add your Projects to showcase in the left-hand menu.

    To enable iCloud Photo Library you must use the same Apple ID on all the mobile devices you use to take and access photos.

    To enable this functionality on your Mac with the newly updated OS X, head on to System Preferences > iCloud. Click Options near Photos and choose iCloud Photo Library.

    It will store your files in their original format, including time-lapse and slo-mo.

    You cannot take photos with your Mac so you must ensure your mobile devices have iCloud photo management enabled. You can do it by going to Settings, clicking on your photo and name, then moving on to iCloud > Photos and turning on the cloud library option (should be at the top of the Options list).

    By turning on the iCloud Photo Library toggle you will be automatically sending your whole photo library to iCloud and allow all users of devices to access your photos and videos. This ensures that your precious memories are preserved in case your device is lost or damaged. In this menu you also have choices to download originals or optimize the storage on your mobile device — this option is especially useful if your device runs low on space. You can also enable automatic upload of new photos to all of your iCloud devices.

    From now on, when you enhance the photo, the changes are propagated across all devices. If you delete an image, it will be gone on all devices, too.

    But if you change your mind and decide to restore the photo, nothing to worry about: there’s a handy folder with Recently Deleted photos that will still be available for 30 days until being erased forever.

    Make sure to watch for remaining space in your iCloud drive. When you run out of free 5 GB, the upgrade to 50 GB is very affordable, compared to other cloud storage providers.

    When you have your photos on Mac either by importing from your camera or iCloud, your next step would be arranging them into albums and folders.

    This helps to easily retrieve the necessary file from thousands of photos all of us keep on our devices. You can easily create an album with your selected photos by heading on to Photos > Photos (side menu) and right-clicking on chosen images. Then select the option “Add to” and either select an existing album or choose “create new” for a brand-new album.

    Another way is to create a new album in Albums and then moving your photos at the next stage.

    Folder is the next level of photo organization. You can move several albums to one folder, for example, for each of your family members.

    There are also Smart Albums that conveniently arrange photos in your Mac based on several parameters, including Faces and even a camera model, however, Smart Albums cannot be synced with the cloud.

    For even quicker browsing of your photos, you can place your most important albums into the sidebar at the right-hand side of Photos. Make sure to enable the function Show Sidebar in the menu.

    If you have more questions about effective photo management on Mac, click here for more answers.

    A few final thoughts

    Managing photos on Mac is a quite simple process. But in order to ensure that all media files are easy-to-manage and available on all your devices, you should follow all the tips above.

    Make sure you have backups of your photo library because losing a physical device might turn in losing all the precious memories located on its hard disc.

  • 5 Video Camera Filters and When to Use Them

    5 Video Camera Filters and When to Use Them

    Most people don’t realize that shooting a video isn’t as easy as writing a script and having it acted out. A lot of thought goes into video angle, filters, lighting, and more. Video camera filters are an essential tool needed to make people and scenery look good in videos. Here are five you need to own, and when to use them.

    1. Ultraviolet (UV) Filters

    UV filters remove UV light from the sun, but leave visible light alone. Videos are a lot more sensitive to UV light than the human eye. Without a UV filter, videos can appear blue tinged or washed out. Most of the time, you can add a UV filter as a protective film on your lens and use other filters along with it.

    When to use it: When you are filming outdoors and there is a lot of sunlight. A sign that you need a UV filter is when all of your actors are squinting.

    2. Polarizing Filters

    Polarizing filters are similar to UV filters. They remove polarized light, which is uneven lighting caused by reflected light from the sun or other sources. With a polarizing filter, you get more saturated and vibrant colors in your videos. Typically, polarizing filters mount with a rotational adjustment to account for the angle of reflecting light.

    When to use it: When faces appear uneven because of reflected light. Many photographers opt to always using a polarizing lens because of the effect on color saturation.

    3. Neutral Density Filters

    ND filters reduce hazy backgrounds created by the sun and other harsh sources of light. Essentially, they absorb light throughout the color spectrum to allow for more controlled lighting. The camera person can decide how much light to allow, based on the ND filter chosen.

    When to use it: Anytime you have harsh lighting, such as outside in the middle of the day. Sometimes you need ND filters indoors when there are fluorescent lights or uneven lighting.

    4. Diffusion Filters

    Diffusion filters create a slightly blurred effect that can give faces a glow and remove wrinkles. You can use stronger diffusion filters to create a dream effect, too. Most of the time you won’t be using a diffusion filter, but it is good for certain effects.

    When to use it: When you’re filming people and you want them to look younger and brighter.

    5. Sepia Filters

    Sepia filters change the color temperature of your video to a hazy, sepia tone. You can also get other color filters. For instance, an orange filter.

    When to use it: When you want to depict historical scenes or flashbacks.

    There are all sorts of other specialty filters you can buy, such as a star effect, fog, or various color corrections. You can even buy camera filters that graduated from one side to the other. However, the ones in this article are a great place to start if you are producing a video for the first time. Make sure to at least try an ND filter. Good luck with your video production!

  • Latest Digital Photography Trends

    Latest Digital Photography Trends

    Do you want to be a successful photographer? Do you want to step miles ahead of your competitors? As technology advances, every year there is a myriad of developments in digital photography that can boost the way you take, store, design and publish your photographs. After careful research, we’ve come up with a shortlist of the latest digital photography trends. Follow these trends to ultimately enhance your photos, becoming a successful photographer. Here’s a look.

    (more…)

  • High Quality Printing Services: You Can Now Turn Your Dream into Reality

    High Quality Printing Services: You Can Now Turn Your Dream into Reality

    While you may be interested in carrying out your own printing projects, the reality is that commercial or professional printing services are a cost and time effective alternative worth considering. Attempting to carry out your own printing jobs will end up costing you more than you had envisioned without the desired results.

    Aspects such as time, paper, modern equipment and the ability to produce dozens of copies or multiple products need consideration. You probably do not have the time to spare especially if you want to create products that appear professional.

    (more…)

  • How You Can Use A Canon “L” Series Lens With Henry’s Rentals

    How You Can Use A Canon “L” Series Lens With Henry’s Rentals

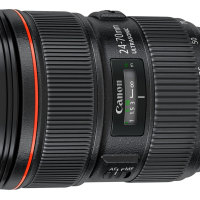
    The Canon “L” series of lenses are synonymous with professional photography. Those lenses are built with the best quality materials that offer the best build and durability of any lens on the market. Of course, such quality comes at a price – a price that puts those lenses out of reach for many amateur photographers.

    For Ontario, Canada residents, they may be familiar with a photography store called Henry’s that sells many photography and videography products. Henry’s is now providing the ability for amateur photographers to use the best lenses – in addition to other Canon lenses – without spending thousands of dollars. If you are an amateur photographer, you can now rent a lens for much less than it would be to buy one using Henry’s Rentals.

    (more…)

  • Four Essential GoPro Accessories for Shooting Stunning Video

    Four Essential GoPro Accessories for Shooting Stunning Video

    Those who have seen the stunning variety of experiences that a GoPro camera can shoot in High Definition video can attest to the camera’s quality. The GoPro HD camera is a rugged, compact, and light device that has given the world a unique style of highly personalized photography and videography. From accompanying divers on marine adventures to traversing rocky off-road terrain on cycle, bike or car, the GoPro can record it all with stunning clarity.

    By itself the GoPro is simply a light, durable, and compact camera. In order to make full use of its features and durability, it is important to invest in a few versatile accessories. You do not have to buy a lot of accessories – just aim to buy rugged, durable accessories that can match the kind of quality of video footage you aim to shoot with the camera. With a small backpack of GoPro accessories and your GoPro, you can be ready at a moment’s notice to shoot underwater, on the road, and even in the air.

    (more…)

  • The Right DPI: Why It Matters in Business Document Scanning

    The Right DPI: Why It Matters in Business Document Scanning

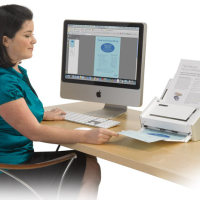
    Scanners may not be as frequently used in offices as printers or desktop computers, but they are very useful for preserving and storing hard copy documents and their contents. When your office receives a document, such as a signed contract from a client, the fine print of an insurance plan, or a purchase receipt (both of which you do not have soft copies of), you may need to scan the documents and keep the digital copies as backup.

    You might ask, why not just photocopy them? There are many things to consider here. First, if you need to keep a soft copy instead of another hard copy of the document, you’ll need to have it scanned. Second, if the integrity of the print or the signatures on the paper will be compromised on the copy (if the pen mark is too faint, the writing may not be visible anymore on a photocopy), it will be better to scan it to preserve the entirety of the document. Third, with a soft copy in hand you can always print out precisely similar hard copies of the documents any time you need them. That should cover the convenience of having an instant hard copy from a photocopier.

    Take note that two of the reasons above speak of the importance of preserving the integrity of the original documents, that none of them be missing any visible component when reproduced or stored in archives.

    (more…)