Blog

  • Introduction to HTML

    I recently wrote two posts regarding designing Web sites: Designing Web Pages: Tables or CSS and Introduction to Cascading Stylesheets (CSS). The information presented in both of those articles may be advanced for those just starting out with creating Web pages.

    I decided to create this post to provide an introduction to HTML and create a Web page. This post will create a very simple Web page that you can then display in a Web browser.

    (more…)

  • E-mail Frauds and Scams

    For many years now security experts have been warning others about fraudulent e-mails and scams. Even after the warnings, there are still people who are taken in by these frauds and scam artists. The cost to those who are taken in can be hundreds of thousands of dollars or even their entire identity.

    In this post I will discuss the types of scams and frauds that are mostly used in e-mails and ways to avoid them.

    Phishing

    In the past you may have received e-mails from a trustworthy institution asking to confirm some details about yourself. These details can include everything from a user ID, password to your account or PIN number. These e-mails are sent by scammers looking to steal important information from you. This is known as phishing.

    Phishing has been around for many years, but has now entered the security spotlight as more users get caught in the scams.

    Usually someone will receive an e-mail from a reputable company asking the user to confirm some important information about themselves. The e-mail usually contains a link that directs the user to a form on a Web page. The Web page is designed to look exactly like the company that they are pretending to be. The form, however, is located on a server the scammer uses and can control.

    Once the user fills in the information on the form and submits it, the scammer can then use that information as they please. This is a major cause of identity theft as the scammer can now assume the identity of the user.

    Prevention

    There are many ways to prevent losing important information to a scammer. The most important method is common sense. I don’t know of any financial institution, or any company for that matter, that will ask for personal information through e-mail. If you receive an e-mail such as this, and are unsure, then call up the company and let them know. Many times they will then take action to stop those who are sending the e-mails.

    A clue to determining if an e-mail is legit is to look at the spelling and grammar. Many times the spelling and grammar will be extremely poor, which indicates that a company did not send out the e-mail.

    Many of the newer browsers, such as Internet Explorer 7, Firefox 2.0, and Opera all have built-in anti-phishing measures. These browsers will notify you if you access a Web page that has been flagged as a phishing site. If you haven’t already, I suggest you upgrade to one of these browsers.

    Advanced Fee Fraud

    Have you ever received an e-mail from someone who says they are an official with millions of dollars? You are then to contact them as you are the beneficiary of this so called money? If you have then you know about the scam known as Advanced Fee Fraud also known as the 419 fraud.

    These frauds are different than phishing in that they try to get your money and not your information. It is called the 419 fraud after the section of the Nigerian penal code which addresses fraud schemes. Many of these scams deal with traveling to Nigeria, mailing something to Nigeria, or meeting with a Nigerian official.

    Many of the e-mails tied to the 419 fraud usually involve some sort of urgency such as a health matter. An individual representing someone else with a vast fortune will contact you stating that you are the beneficiary of the fortune. In the e-mail, you will be instructed on transferring money to the unknown individual for fees and other costs of transferring the millions to you. This is how many of the scammers make their money.

    Prevention

    Since this scam occurs through e-mail, the biggest method of preventing it is to use your common sense and just delete the e-mail. Most of the time you can spot these e-mails by the extremely poor spelling and grammar. Sometimes the spelling is so bad it becomes comical.

    If you want some enjoyment of seeing these 419 fraud scammers getting what they deserver, check out: 419 Eater. What the author of that site does to the scammers is very amusing.

    Summary

    In this post I have talked about two of the popular methods that scammers use to steal your identity or money. It is important to understand that the best method of protecting yourself is to simply use common sense. I you don’t recognize the sender of the e-mail, just delete it.
  • Creating MP3 Files from a CD in Media Player

    For many years now MP3 music files have become mainstream. With the enormous number of MP3 players on the market, it seems everyone owns one. It is hard to walk down the street and not see anyone listening to their MP3 player. There are many people out there who may not know how to create their own MP3 files from their CDs.

    In this post I will provide a step-by-step tutorial on creating MP3 files from your CDs using Windows Media Player. I chose this application because it is readily available on any Windows system.

    Specify MP3 Options

    Before we begin creating MP3 files it is important to first ensure we have set some important settings in Media Player. If you haven’t already done so, please start Windows Media Player.

    To set the MP3 options, use the following steps:

    1. Right-click an empty portion of the top toolbar to display a menu.
    2. From the menu select Tools->Options. The Options dialog box should now be displayed.
    3. Click the Rip Music tab.
    4. Under Rip music to this location you can specify the location you want the MP3s to be stored. If you would like to change this directory, then click Change and select a new directory. Click the File Name button to change the file naming convention for your MP3 files.
    5. Under Rip settings, select mp3 from the Format list.
    6. By default the audio quality is set at 128Kbps. I usually choose a higher quality since space is not really an option. If you want better quality, move the Audio Quality slider to the right. I usually select 256Kbps as the quality. The file size will be doubled by the quality will be better.
    7. Click OK to save your changes and close the Options dialog box.

    You have now setup your CD ripping settings and are ready to convert your CD tracks to MP3 files. Since these settings are saved, you will not need to specify them when you create MP3 files in the future.

    Converting CD Tracks to MP3 Files

    Windows Media Player makes converting CD tracks to MP3 files very easy. The process is fairly quick and you can convert multiple tracks from a single CD at the same time. Use the following steps to create MP3 files:

    1. Insert an audio CD into either the CD or DVD ROM in your computer. It doesn’t matter which drive you insert the disc into as both can read CDs.
    2. In the Windows Media Player menu bar at the top, click Rip
    3. Click the CD/DVD-ROM drive from the list on the left.
    4. A list of the audio tracks will now appear with all tracks selected. Click the Start Rip button in the lower right corner if you wish to convert all tracks to MP3 files. If you wish to select only a few of the tracks, then uncheck the checkboxes that you don’t wish to convert, and then click the Start Rip button.
    5. The progress bar will be displayed beside the tracks currently being converted. Once the message Ripped to libraryappears beside the tracks you selected, it means that the MP3 files have been created and are saved in the directory specified in the previous section.
    6. You can repeat the above steps to convert tracks in other audio CDs. The MP3 directories are organized by artist and then album within the directory you specified in the previous section. This allows you to convert many CDs while still maintaining some organization.

      Note: You will also find some JPEGs included with your MP3s. These are images of the album covers if you have downloaded them from the Internet.

    Summary

    Creating MP3 files is really easy with Windows Media Player. After you save your MP3 settings, all you need to do is insert an audio CD and select the tracks you want to convert to MP3 files.

  • Wireless Security: WEP and WPA

    I have written several posts with regards to securing your wireless network connection. In many of those posts I have talked about choosing WPA over WEP, and briefly explained why I do that. In a post titled Network Glossary of Terms I provided a simple definition for both security protocols.

    I have decided to expand on those definitions by providing a more information post about WEP and WPA. Hopefully, this post will help you better understand how a wireless network is secure.

    (more…)

  • Web Site Design Tips

    Like many of you, I have been surfing the Web for many years and have visited hundreds of Web sites. I have found Web sites through search engines, e-mails, and other Web sites. Many of these Web sites have a great layout and provide very valuable, useful information. Others are more complex to navigate and don’t really help with anything.

    In this post I will provide several points that I think makes a Web site great. Many of these points are common sense, and can easily be implemented.

    Points to Keep in Mind

    1. Easy Navigation – This is a very important point, and one that will determine whether I stay and visit more pages. It is important to ensure that your visitors can easily find their way around your site. This can be a simple menu list on the left or right side of the Web page, with the content right next to it. You can even have a menubar at the top of the Web page for more important categories.
    2. Readable Text – Many sites now try to use a very small font size. The author of the Web site may be able to easily read the text, but many of the visitors may have trouble reading small fonts. I try not to go below a 10pt font equivalent on my Web pages. I also try to find a common font that is easy to read such as an Arial or Verdana font. If you use CSS, then you can set the font family and size in one file that can be easily changed if you choose.
    3. Appealing Colours – I am not to keen on Web sites that have a bright pink or yellow background. I find it hard to view the Web page, let alone read the content. If I want a bright background, then I usually choose white and have black text. This is what most people are probably used to. I then add colours to my Web pages through the use of images and borders.
    4. Small Image Sizes – I hate Web sites that have large images that take some time to download. I have a broadband Internet connection, but there are still sites that make take some time to download because of a large image. You should try to compress your images as much as possible to reduce the size of the images.
    5. Reduce Page Size – This point goes hand-in-hand with the previous point. I like to write long posts in this blog, but if you can try to keep your page sizes to a minimum. Including the previous point you should try to break large articles into several pages, reduce the Javascript, CSS and HTML sizes. Create separate Javascript and CSS files that are included in your HTML pages, and remove excessive spaces, tabs and comments from your HTML.
    6. Flash Introduction – This is a worthless and pointless page. I have seen sites that display some flash animation when you visit the Web site. If the there is a skip intro button, I usually just click that to avoid seeing the introduction.
    7. Too Much Advertising – I don’t mind if people place ads on their Web sites, but sometimes they can go overboard. I have visited Web sites that have ads on what seems like every inch of a Web page. Sometimes there is so many ads, that I have trouble finding the actual page content.
    8. Write Unique Content – This is probably the most important point when creating a Web site, especially for generating traffic. Spend the time to write you own unique content instead of copying someone else’s content. There are sites out there have the same content as many other Web sites. I like to read unique content that provides more and different information than other sites.
    9. Ask for Opinions – Join Web sites that have the same niche as yours and then ask others to visit your Web site and provide an opinion. This can help you determine what you need to change.

    Summary

    This post provided many points that you can apply to your Web site to make your visitors enjoy their visit. As always, your Web site will probably change over a period of time since no Web site keeps the same look over many years.

  • Regular Computer Maintenance

    A little while ago I wrote a post titled How To Keep Your Computer Running Smoothly where I explain several tools you should install and use to help keep your computer running. In this post I will provide step-by-step instructions on what I do to keep my computers running without any problems.

    (more…)

  • Introduction to Cascading Stylesheets (CSS)

    In a previous post title Designing Web Pages: Tables or CSS, I briefly talked about using CSS to layout the content of a Web page. I didn’t go into detail about how CSS files are used in conjunction with Web pages or even how they are created.

    In this post I will provide a simple introduction to cascading stylesheets and how you can link them to an HTML file.

    (more…)

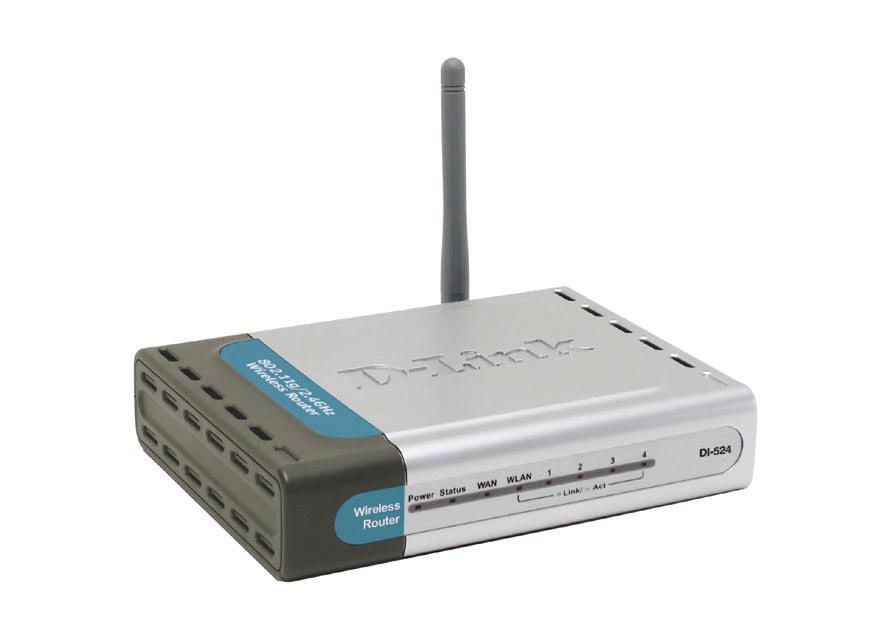
  • Securing the D-link DI-524 Wireless Router

    Securing the D-link DI-524 Wireless Router

    I recently created a post titled Securing Linksys WRT54G Wireless-G router in which I provided step-by-step instructions on securing the WRT54G router. The Linksys WRT54G Wireless-G router is a popular router, but it isn’t the only one on the market. In this post I will discuss how to secure another wireless router, the D-Link DI-524.

    Note:

    If you are having trouble with the administrative pages for the router, try using the Internet Explorer Web browser. The administrative Web pages for the router seem to work better in Internet Explorer.

    Securing Your Wireless Router

    Note:

    If you need to reset your router back to the factory defaults, then please read How to Reset the D-Link DI-524 Wireless Router.

    To secure your D-Link DI-524 wireless router, follow these steps:

    1. Open your Internet browser and enter the following in the address bar: http://192.168.0.1.
    2. Note:

      If you have changed the IP address of your wireless router, enter that into the address bar. By default, the address is 192.168.0.1.

    3. Enter the user ID and password for your router. If you haven’t changed it, the default user ID is “admin” and the password is “blank”. We will change it later if you haven’t already changed it.
    4. We will first change the administrative password. First click the “Tools” tab at the top of the page. The “Admin” page should be displayed.
    5. Within the “Administrator Settings” on the right, enter a new password for the administrator beside “New Password” and then again beside “Confirm Password”.
    6. Click “Apply” at the bottom of the page. The next time you access the administrative options, you will need to enter the new password with the “admin” user ID.
    7. Next, click the “Home” tab, and then select “DHCP” on the right. The “DHCP Server” Web page should now be displayed.
    8. We will now limit the number of IP addresses assigned by your wireless router. Count the number of computers that will connect to the router, and change the “Ending IP Address” to allow that many computers to connect.
    9. For example, if you have three computers that need to connect to your wireless router, enter “102” into the text box. The first computer will get the IP address 192.168.0.100, the second 192.168.101 and the third 192.168.0.102.

    10. Click “Apply” at the bottom to save your changes.
    11. Now we will secure you wireless connection to prevent others from connecting. Under the “Home” tab, click the “Wireless” option from the left.
    12. Beside the “SSID” option, enter the name for your wireless network connection.
    13. This is where the steps are different depending on which revision of the DI-524 you are using. Beside “Security”, if you see “WPA-PSK”, then you should select that option, and then go to step 14. If you see a dropdown list, select “WPA”. If you can’t connect using “WPA”, then select “WEP”. Using “WPA” will provide a much more secure connection that using “WEP”. For more information about WEP and WPA please read Wireless Security: WEP and WPA.
    14. Click “AES” beside the “Cypher Type”.
    15. Make sure “PSK” is selected beside “PSK/EAP”.
    16. Now you must get very creative. Specify a long “Passphrase” with a mix of upper and lower case letters, numbers and punctuation. Once again, please read Creating Secure Passwords for tips on how to do this. In this case the longer the better.
    17. Make sure you write down this key somewhere, either on a piece of paper or in a text document on your computer. You will need this information when you connect to your wireless network.

    18. Enter your passphrase next to “Passphrase” and again beside Confirmed Passphrase.
    19. Click Apply to save your security settings.
    20. Now you are all done securing your wireless router and network. All you need to do is connect to your network, and enter your “Passphrase” exactly as you specified it. I won’t go into detail on how to connect to your wireless network, as I will save that for another post.

    Wireless Router Security Connection Questions

    How come we didn’t disable the SSID broadcast? Won’t that help with securing my wireless connection?
    It has been mentioned many times that disabling your SSID broadcast will help secure your network. The reality is that those who attempt to get into your wireless network will be able to easily pick up or SSID whether it is broadcasted or not. You may also have problems connecting to your wireless router if you disable the broadcasting of your SSID. I keep it enabled.
    Question: Why do you specify to use WPA – Personal first, and not WEP?
    The reason is that WPA is much more secure than WEP, and therefore you should use that security mode over WEP. An experienced hacker can easily crack WEP encryption so it doesn’t provide as strong security as WPA. If you can’t use WPA, use WEP because it is still better than nothing.

    Summary

    This post provided step-by-step instructions on securing your D-Link DI-524 wireless router. After following the steps, you should now be confident knowing that you have a secure wireless Internet connection.