Category: Hardware

Any posts that pertain to specific hardware, but aren’t being reviewed, can be found under this category.

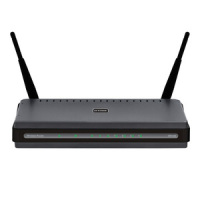
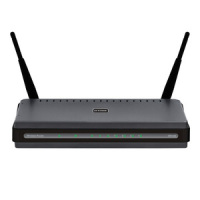
  • How to Reset the D-Link DIR-628 Wireless Router

    How to Reset the D-Link DIR-628 Wireless Router

    A few posts ago I wrote a post titled Securing the D-Link DIR-628 Wireless Router. In that post I outlined the steps needed to secure that particular wireless router. Securing a wireless router is extremely important to prevent others from accessing your network and Internet from their computers.

    There are times, however, where you may need to reset your router back to the factory defaults. You may need to do this if a setting you changed is preventing you from connecting to your router or the Internet, or you don’t know the password to access your router. It is easy to reset the DIR-628 router back to the factory defaults, which I outline below.

    (more…)

  • Securing the D-Link DIR-628 Wireless Router

    Securing the D-Link DIR-628 Wireless Router

    I have written a few guides about securing a wireless router. All the guides in the past were for 802.11g routers, so the routers have been around for many years, and are quite common. This guide will concentrate on a newer router, with many more options.

    The 802.11n proposed standard is becoming much more commonly supported in various networking devices, and has been for the last few years. This post will provide step-by-step instructions for securing an 802.11n device: the D-Link DIR-628 wireless router.

    (more…)

  • About the 802.11 Wireless Network Standards

    I have written many posts regarding wireless networks on Technically Easy. Some of the most popular posts deal with resetting and securing a wireless network. Wireless technology has hit the mainstream over the last few years, especially with more people buying laptops and becoming more mobile.

    Obviously, security is a major concern for most, so they may tend to not invest in wireless technology. For those that do, you are presented with many different network equipment that you can use. The network equipment is advertised as supporting several of the standard wireless networking standards. In this post I will briefly discuss each standard that has been created so you have some knowledge of what it all means.

    (more…)

  • How to Reset the Linksys WRT54GL Wireless-G Router

    How to Reset the Linksys WRT54GL Wireless-G Router

    There may be times where you hare having trouble with your WRT54GL router, which may require you to reset the Linksys WRT54GL wireless-G router. There are two methods of performing such an action, so which method you choose is up to you.

    I recently wrote a post outlining the steps needed to secure a Linksys WRT54GL Wireless-G router. Now I will detail how you go about resetting the router if you do need to revert back to the factory defaults. I will explain the two methods you can use to reset the wireless router.

    (more…)

  • Securing the Linksys WRT54GL Wireless-G Router

    Securing the Linksys WRT54GL Wireless-G Router

    Two of the most popular posts on Technically Easy has to do with securing the Linksys WRT54G and D-Link DI-524 wireless routers. With many people using wireless routers at home, it becomes more important to secure the connection to the router form a computer. When I turn on my laptop at home, I can see at least five wireless networks (all secured).

    I decided to write another “how to secure a wireless router” guide, to help those who may not have one of the two routers listed above. This guide will describe the steps you need to take to secure the Linksys WRT54GL Wireless-G router. The steps required are very similar to the WRT54G, but to avoid any confusion, I created this guide.

    (more…)

  • Connect to Your Network Without Rebooting

    I have had an issue recently when connecting to my wireless network without rebooting. The issue came about when I had dropped my wireless connection from my laptop, but when the router had reinitialized, Windows wouldn’t connect to the network.

    There could be many times where you could lose your connection, and can’t reconnect to the network without restarting your machine. In this post I’ll talk about two commands you can execute to try and reconnect to your network.

    (more…)

  • level_15_access Issue When Logging Into Your Router?

    level_15_access Issue When Logging Into Your Router?

    The most popular posts on Technically Easy has to do with resetting a wireless router, and securing a wireless router. Securing a wireless router can be confusing and difficult, and can offer a few headaches. Many people have e-mailed me, or left comments, about problems that they have had when securing their router. While I try to answer all, there are a few that I have trouble finding a solution for.

    In this post, I will offer an answer to one of the comments that someone had posted about a “level_15_access” message they were getting when logging into their router. I have finally found an answer to this problem, which is explained below.

    The Level_15_Access Issue – Related to IP Address

    When securing a router, you are required to get access to the router’s administrative pages through a web browser. You type in a user ID and password to gain access to these pages.

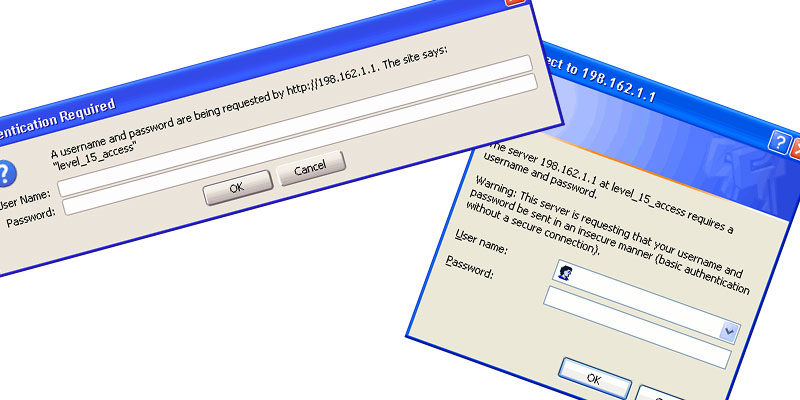
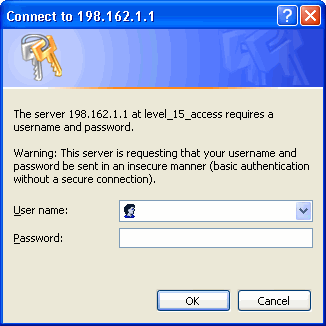
    The steps that I offer when securing a router requires you to log in a few times. When logging in, you may receive a message similar to the following:

    Firefox - Level_15_Access
    Firefox – Level_15_Access

    Internet Explorer - level_15_access
    Internet Explorer – level_15_access

    The above problem is not related to your router, but is a result of entering in the IP address incorrectly. You will notice that in the above screenshots, the IP address is 198.162.1.1. This is not the address of your router. This is the address of another server somewhere on the Internet, which explains why your ID and password don’t work.

    The address that you should enter in your web browser is 192.168.1.1. Once you enter in your ID and password, you should have access to the administrative pages of your router.

  • My New UPS: APC Back-UPS RS 1300VA

    My New UPS: APC Back-UPS RS 1300VA

    I have written many posts about security and archiving. Mostly I talked about backing up data, and securing a router. Today I’m going to talk about my new toy: a UPS.

    I have discussed UPSs in my post titled What is a UPS?, but in this post I will talk about the one that I recently purchased. This UPS will protect my computer, and data, from the effects of “dirty” power and power outages that can occur on a regular basis during violent storms.
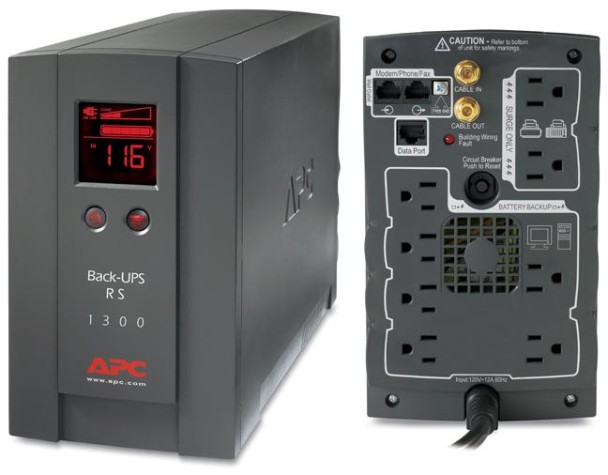
    My New UPS: APC Back-UPS RS 1300VA

    UPS: Protection for Your System

    How many of you have had the experience of losing all your data when the power has gone out? Have you had your system or hard drive crash when a spike in electricity came down the power lines and into your home?

    The above two problems can be quite common to some folks, and can be really frustrating, but they are preventable. Protecting your computer and data is more than just securing your Internet connection, or making backups, it is also about shielding your computer from the elements. This is where a UPS comes in.

    A UPS is simply a box that is connected between the main power from an outlet to your computer. It contains a large battery, that when fully charged, can provide your computer with several minutes of power during a blackout so you can safely shutdown your computer normally.

    A UPS will also protect your computer from the changes in electricity coming to your home from your power company. It will provide “clean” electricity to any equipment connected to it to avoid any electrical damage to the equipment.

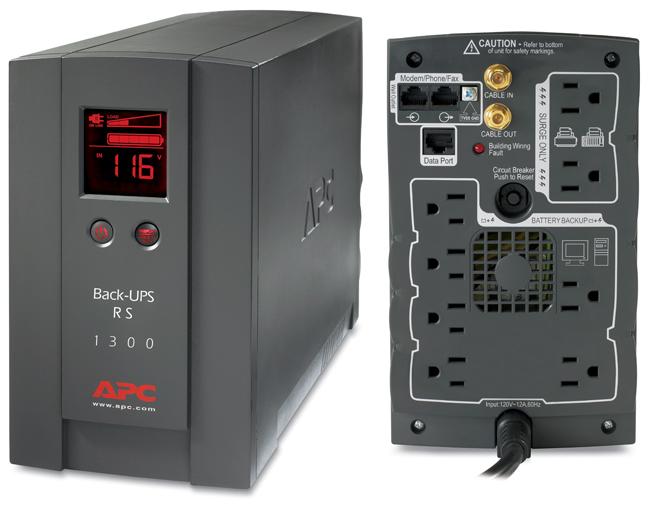
    Recently, I purchased the APC Back-UPS RS 1300VA to protect my desktop computer, cable modem, router, and monitor.

    The Unit

    The UPS I purchased provides 780W/1300VA of power, which is more than enough for the equipment I have connected to it. It is important to choose a UPS that can provide enough power to all the equipment you wish to connect.

    The UPS isn’t large (h: 8.74 in, w: 5.23 in, h: 14.01 in), and weighs about 30 lbs. Much of the weight is from the battery. The small size allows me to place it under the desk without taking up too much room.

    There is a red LCD on the front of the unit that displays various status information about the system, including the current load, the estimated amount of time that can be run off the battery, and the battery charge. You need to cycle through some of the information to display what you are looking for.

    All equipment is connected to the back of the UPS. There are two outlets that provide surge protection only (does not run off the battery), and six connections that provide battery backup. When the UPS is turned off, no power is provded through the battery backup connections, but the surge protection outlets continue to provide power.

    There are also other connections on the back. Two phone jack connections to provide protection to your phone/modem/fax, and protection for your cable line. A third connection, called the data port, allows you to connect the UPS to your computer so you can monitor the UPS using the provided software. I have yet to use the software, but from what I have seen elsewhere, it looks very useful.

    The UPS definitely has everything you need to protect not only your computer, but also your cable and phone line, and monitor it all from your computer. Let’s see what it is like to use.

    Easy-to-Use

    Using the UPS was really easy, and it came with a large poster-size instructions that consisted of diagrams on using the UPS. The instructions are similar to the ones you get with a printer.

    I connected the battery, which was inside the UPS but not connected, and then plugged it into the wall outlet. The instructions stated that it would take 16 hours to fully charge the battery.

    After it was charged, I turned on the system, and was happy to see the LCD light up and tell me that the the battery was fully charged. I then connected the equipment to the unit.

    I connected the monitor and computer to the battery backup outlets. I then connected the cable modem and router to another outlet (they were also connected to a power bar). My external hard drive, and external DVD writer were each connected to two other outlets, which still left one outlet unused.

    I connected my printer to the surge protector outlet because you shouldn’t connect a printer to the battery.

    That was all that was needed to use the UPS. I turned on my computer, and everything started up fine. I took a look at the UPS and noticed that of the 780W of power, my system was using 111W, which means I have more than enough room for other equipment. It also stated that when my computer was on, I would have 28 minutes of power from the battery if I suddenly lost power.

    One of the main reasons I bought the UPS was to keep my cable modem and wireless router active during a power outage. When I turned off my computer and monitor, the UPS indicated that the cable modem and router was using 11W of power. At 11W of power usage, the battery will allow me to run my cable modem, and router for 280 minutes (almost 5 hours) during a power outage. I will be testing this by unplugging the UPS to simulate a power outage to see how long I have before I run out of battery power.

    My next step is to install the software so I can monitor my UPS from my desktop. One thing I like about the software is the ability to put a computer into hibernate state during certain situations.

    My Impression

    Overall I am pleased with my APC Back-UPS RS 1300VA. It was easy to use and well documented. It provides more than enough battery backup outlets for all my equipment, and includes the two additional surge protector outlets for printers and faxes. I’ll have to try the software next to see how it works.