A few months ago I noticed that Mozy was changing their pricing structure so I needed to develop a new data backup solution. Mozy’s new pricing structure made it unaffordable for me to use them for regular data backup solution, so I had to change how I backup my data.
After I had won a license of Handy Backup from Michael Aulia from Craving Tech I decided that it would be a good solution for my data backup dilemma. After thinking about me new data backup solution, I decided to begin to put the solution in place.
Plan for the Data Backup Solution
My current data backup solution with Mozy consists of an external hard drive that is always connected to my desktop, a portable hard drive that I store offsite and then my data stored offsite on Mozy’s servers. Mozy allowed me to backup my data to both their servers and to my portable hard drive. Once I cancel my account with Mozy, I will be eliminating my second offsite backup.
In order to solve the problem, I will be looking at purchasing a second portable hard drive that will be stored offsite. This should handle the job of replacing Mozy in my data backup solution.
To replace Mozy’s software, I will be using Handy Backup, which allows me to configure and manage multiple backup tasks. I have used a similar product in the past, so learning how to use Handy Backup will not be difficult. I explain the steps that I took to setup my backup with Handy Backup below, but first some backup housekeeping.
A Good Data Backup Solution Starts With Organization
Before creating a data backup solution, it is important to first organize the data that you want to backup. Organizing your data properly will ensure that you know where your data is located, that you have the most recent version of the files, and you don’t miss anything.
For me, I organize my data on an external hard drive that is constantly connected to my desktop. This hard drive is mapped to the I: drive on my desktop – always has been and always will be.
On that drive, I organize all my data files, pictures and videos in subfolders so it easy to find a file when I need one. The largest amount of files that I backup are my digital photos. I have organized my digital photos so I can easily identify each photo when I need it. My videos and data files are also organized in a similar fashion.
Steps to Create My Data Backup Solution
Since I have organized my digital files, I can now create a task in Handy Backup to backup all my files from my external hard drive to my portable hard drive. My portable hard drive is mapped to the O: drive on my desktop, and will remain that way for all my backups.
The following steps outline the process that I used to create the Handy Backup task as part of my data backup solution.
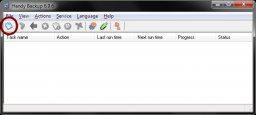
- Start Handy Backup and then click the “New Taks” icon.
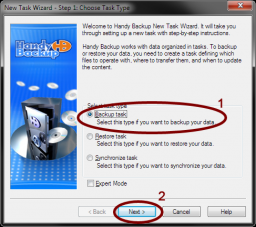
- Select the “Backup Task” from the available task type, and then click “Next”.
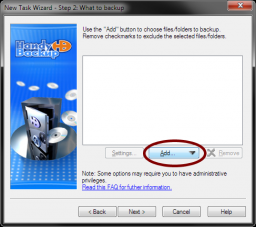
- Next, the files/folders will need to be added. Click the “Add…” button to display a list of what can be backed up.
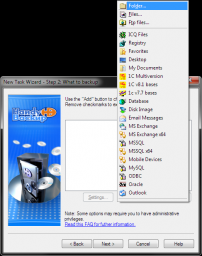
- Since I organized my data into folders, I will select the folder option, and then specify the folder to backup. I will repeat these two steps for all folders.
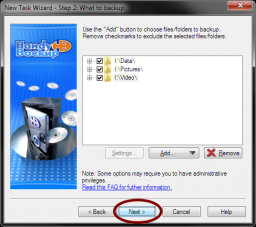
- Once all folders have been added, click the “Next” button to continue.
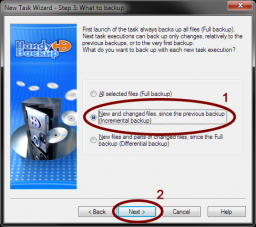
- Select the “New and changed files, since the previous backup (Incremental backup)” option. This will only backup files that have changed from the last backup which will save time. Click “Next” to continue.
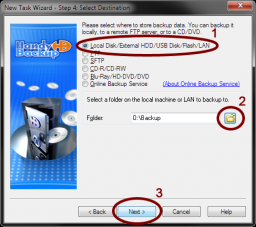
- Select the “Local Disk/External HDD/USB Disk/Flash/LAN” option to backup to an external/portable hard drive. Click the folder button and select the location you want to store the backup, and then click “Next” to continue.
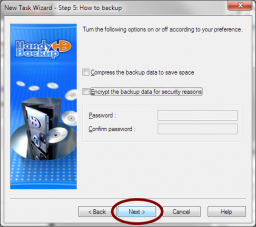
- You can compress and encrypt your backup if you wish. After make you decision, click the “Next” button.
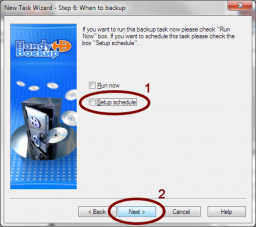
- You can schedule the backup, but since I will be backing up my data on demand I unselected the “Setup schedule” option. Click the “Next” button to continue.
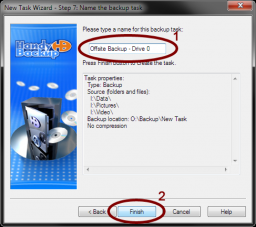
- Now you need to name the task. If you will be creating multiple backup tasks you should give it a name that describes the backup. After naming the backup task, click the “Finish” button.
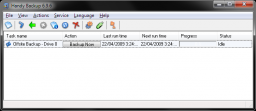
- The newly created backup task should now appear in the Handy Backup task list. If you wish to run the backup, click the “Backup Now” button.
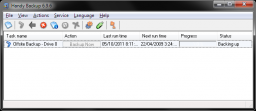
- I clicked the “Backup Now” button to backup my data.
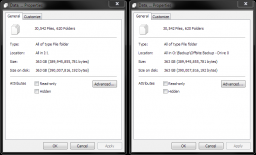
- Once my backup completed, I verified the properties fo the original and backed up data to ensure they were identical – and they were.
(Click to enlarge)
(Click to enlarge)
(Click to enlarge)
(Click to enlarge)
(Click to enlarge)
(Click to enlarge)
(Click to enlarge)
(Click to enlarge)
(Click to enlarge)
(Click to enlarge)
(Click to enlarge)
(Click to enlarge)
This is one part of my data backup solution. When I add the second portable hard drive to the solution, I will make a copy of the current task and then change the destination folder so the files will backup to my new portable hard drive.
If you have data that you don’t want to lose, it is important that you create your own data backup solution to keep your data protected.
