Maternity photography is a wonderful way to capture memories of your pregnancy. Having a visual record of the way your body looked can be valuable. It can serve as an important reminder of your strength and capability. Just looking at photos of your strong and powerful pregnant self can give you the strength to get through teething, the terrible twos, or any of the other parenting challenges that await you in the years ahead. Whether you love being pregnant or just want your baby to come out already, you will want to take at least a few pregnancy pictures before the big day.
Category: Digital Photography
All posts relating to digital photography, including both hardware and software. Tutorials and reviews are the most common types of posts.
-
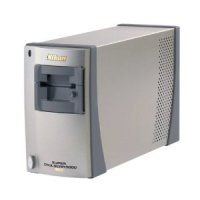
The Benefits of Scanning Slides with a Slide Scanner
Through the history of photography, slides once played a dominant part in the sharing and storage of photos. In recent years their popularity has declined, but there has been a small and loyal following that has held onto their slides and enjoyed sharing them with family and friends. Sharing these slides is not always easy, and when others are wanting to view and share cherished family memories getting copies of slides is not a simple task for most people.
-
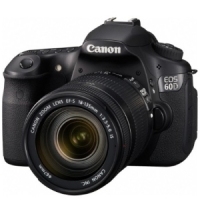
Take Great Photos with These Portrait Photography Tips
Creating portraits is one of the most exciting new hobbies a person can take on. While a person may feel overwhelmed in his or her journey to take great photos, that should not be the case. There are some easy tips a person can follow to take great photos that last for years to come. This article will discuss the tips that will help a person become a better photographer.
-

What is a DSLR Camera?
DSLR, or digital single lens reflex, is a type of digital camera that’s typically a grade-above the more mainstream Point-and-Shoot compact digital camera, as well as what are known as advanced digital cameras (aka ‘bridge-cams’). To help you grasp the concept of the DSLR, let’s first take a basic look at the original SLR.
The SLR has long been the only type of camera advanced amateurs and professionals would use and, largely, still is. The concept is fairly simple: most film SLR’s have an interchangeable lens, a semi-automatic mirror, pentaprism, AF sensor, shutter, and view-finder (among other, more technical items). Most used (notice the past tense used here–as film-based SLR’s are practically extinct) a 35mm-based film and could be outfitted with a large array of autofocus (AF) and manual lenses.
Fast-forward to the present: DSLR cameras have largely replaced the venerable SLR. Digital SLR’s use many of the same concepts (especially the interchangeable lens concept) and even some of the same mechanical parts as SLR’s, but employ much more sophisticated hardware such as computerized processors, CMOS circuits, and an LCD viewfinder.
-
How to Profile a Scanner in VueScan
I have written several posts in the past about how I use VueScan to scan in old printed photographs, but never talked about how to profile a scanner in VueScan. While it took some getting used to, I have managed to create a VueScan scanning workflow that works for me. While everyone will have their own different workflow, the important thing to remember is that regardless of your workflow, you should take the time to profile a scanner in VueScan.
Why is it important to profile your scanner? Simple. All scanners don’t reproduce the same colours the same way. Even scanners that are the same model may have a minor variation of a specific colour. Profiling your scanner allows VueScan to produce scans that are as true to life as possible. While profiling your scanner may sound complicated, it isn’t difficult and I’ll step you through the process in this article.
Scan Properly: Profile a Scanner in VueScan
Before you profile your scanner you will first need to buy a IT8 calibration target. They aren’t expensive, and can be used to profile any scanner. I purchased by calibration target from Wolf Faust for $10 USD plus $10 USD shipping. The target was packaged in a sturdy cardboard envelope, and within a second sturdy envelope inside the cardboard one. The target itself was inside a plastic sleeve to protect it from dust.
Steps Needed to Profile a Scanner in VueScan
Once you have your IT8 target, you can use the following steps to profile a scanner in scanner:
- Place the IT8 target onto your flatbed scanner, as you would a photo. Turn on your scanner and then load VueScan.
- Click the “Input” tab, and then select “Profile Scanner” from the “Task” dropdown option.
- Next, click the “Color” tab, and then click the “@” button next to “Scanner IT8 data” and select the IT8 description file.
- Click the “Preview” button to preview the IT8 target in your scanner.
- After the preview is displayed, a cropping mask will be displayed over the image. This mask will need to be adjusted to line up with your target. You can simply drag the border of the cropping mask so it matches your target. This step is important if you wish to profile a scanner in VueScan properly.
- Once the cropping mask is aligned with your target, click “Profile->Profile Scanner” from the top menu.
- A file called “scanner.icc” is created in the same folder as “vuescan.ini”.
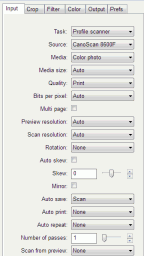
VueScan – Task – Profile Scanner
(Click to enlarge)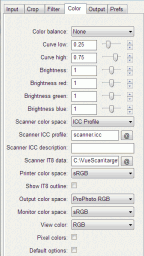
VueScan – IT8 Scanner Data
(Click to enlarge)Note:
The IT8 calibration target that I received from Wolf Faust didn’t come with a description file. The description files are available from the website where I ordered the target. If you don’t have a description file, check to see if you can download one from the website where you ordered your target.
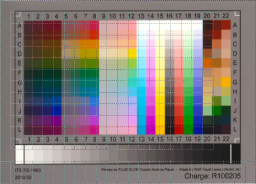
VueScan – Copping Mask Not Aligned
(Click to enlarge)
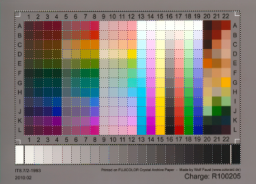
VueScan – Copping Mask Aligned
(Click to enlarge)
VueScan – Profile Scanner
(Click to enlarge)When you want to scan a photo, you can specify the scanner ICC profile you created using the above steps. You specify the profile in the “Scanner ICC profile” option under the “Color” tab.
By using a profile, you can now scan photos with the correct colours with minimal adjustments needed. Getting the correct colours is one of the main reasons to understand how to profile a scanner in VueScan.
-
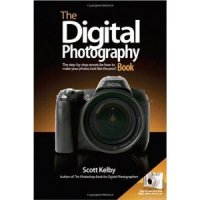
Do You Want to Take Better Digital Photos?
I’ll admit right up front that I am not a great digital photographer, so I am always looking to take better digital photos. I can take some great shots from time to time, but there are many times I look at the pictures and think, “what did I do?” It is all part of the learning process – I learn by doing not by taking classes. If I take a bad digital photo I always like to analyze why the photo didn’t work out the way I had intended.
A few months ago I received a gift: a boxed set of digital photography books. I have owned many different digital photography books in the past, but these books were different in the way they were written. The books made digital photography, and photography in general, easier to understand to the point where I started to take more good pictures than bad ones.
Learn to Take Better Digital Photos the Easy Way
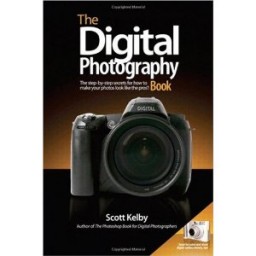
In case you were wondering, the boxed set was called: Scott Kelbys Digital Photography Boxed Set, Volumes 1, 2, and 3. If you would like to become better at taking digital photos, I highly recommend that you purchase this set of three books. Regardless of whether you are new to digital photography, or experienced, you will find learn new as you read through these books, and then be amaze at how you have learned to take better digital photos.
The one thing that makes these books stand out is that fact that they aren’t long-winded. Each page is short, contains a photograph of the topic at the top, and a few paragraphs that explain the topic. Each page covers a single topic, and is very easy to read. Scott doesn’t go into confusing details about how to take a great photo – he just tells you how to do it. Many books would go into detail about setting the aperture, shutter speed, and ISO for taking a specific photo, but Scott would just tell you what settings you should use without the extra long-winded explanation, so you learn to take better digital photos easily.
Scott also tries to add a little humour to some of the topics to keep the lessons interesting. While it isn’t over the top, it does keep you wanting to read more. At the end of each book, there are example shots that he has taken, and below each picture he explains – in step-like-form – how he took each of the shots. This allows you to understand what you need to do to take a similar photo.
Very large books have been written to help with understanding digital photography. Scott’s books, however, are just over 200 pages each. Since each page isn’t very long, it won’t take you long to read through each one. Another reason there are three books is because he covers many different subjects throughout all three books. Everything from portraits, group shots, weddings, sports photography, and photography equipment are explained through the three books.
3 Volumes That Explain how to Take Better Digital Photos
The first volume sets the stage for the next two. By starting with volume one, you begin to understand the basics of digital photography. The first chapter doesn’t go into introducing you to apertures, shutter speeds, or equipment, but rather how to get tack-sharp photos – something everyone who takes photos would probably like to learn. The chapters for the first volume are self-expanatory:
- Pro Tips for Getting Really Sharp Photos
- Shooting Flowers Like a Pro
- Shooting Weddings Like a Pro
- Shooting Landscapes Like a Pro
- Shooting Sports Like a Pro
- Shooting People Like a Pro
- Avoiding Problems Like a Pro
- Taking Advantage of Digital Like a Pro
- Taking Travel & City Life Shots Like a Pro
- How to Print Like a Pro and Other Cool Stuff
- Photo Recipes to Help You Get “The Shot”
As you can see there are many topics discussed in volume 1 alone, and set the basis for allowing you to take better digital photos. Volume 2 continues to build from that with the following chapters:
- Using Flash Like a Pro
- Building a Studio from Scratch
- Shooting Portraits Like a Pro
- Shooting Landscapes Like a Pro
- Shooting Weddings Like a Pro
- Shooting Travel Like a Pro
- Shooting Macro Like a Pro
- Pro Tips for Getting Better Photos
- More Photo Recipes to Help You Get “The Shot”
Between the first two volumes, you can easily see that there are many topics discussed – many topics that you would probably be interested in learning to help you take better digital photos. Still, there is one more volume that covers the following:
- Using Flash Like a Pro, Part 2
- Using Your Studio Like a Pro
- The Truth About Lenses
- Shooting Products Like a Pro
- Shooting Outdoors Like a Pro
- Shooting People Like a Pro
- Shooting Sports Like a Pro
- Pro Tips for Getting Better Photos
- Avoiding Problems Like a Pro
- Yet Even More Photo Recipes to Help You Get “The Shot”
While many topics may seem to be repeated throughout several of the books, each one provides even more tips to help make you a better photographer.
If you would like to take better digital photos, and you would like a straight-forward approach to doing so, I highly recommend you pickup a copy of Scott Kelbys Digital Photography Boxed Set, Volumes 1, 2, and 3 if you want to take better digital photos.
-
Advantages and Disadvantages of RAW Files
This is the second post in my two post series on discussing the JPEG and RAW file formats. My previous post discussed the advantages and disadvantages of JPEG files, and this post will discuss the same topic for RAW files.
Unlike JPEG files, however, there are many drawbacks to using RAW files, and most who use digital cameras probably won’t want to use this format. The more experienced photographers, on the other hand, may love what RAW has to offer.
-
Advantages and Disadvantages of JPEG Files
I have received several e-mails in the past regarding JPEG and Raw files that are produced by digital cameras. There is a huge debate online about which image format you should use – some of the debates can get pretty heated. In reality, like all such debates, the answer is: it depends.
While I have written many posts about both JPEG and Raw image formats, I decided to dedicate an entire post to each one, to sort of provide a more comprehensive description of each. After reading the two posts, hopefully you will determine which format best suits your needs.
The most common file format in use.
The JPEG file format has been around for many years, and is support by every image editor and web browser on the market. It is also supported by every digital camera, and any video camcorder that can also take pictures. Every digital photo print shop also supports the JPEG standard. If you want a universal image format, the JPEG format is the one to choose.
Smaller file size.
One aspect of the JPEG file format that has made it so popular is the fact that it doesn’t take up much storage space. This was important years ago when hard drives were much smaller, and the Internet connection speeds were much slower.
Today, digital cameras that are set to save JPEGs can save them much faster than when using the Raw format since their smaller size means camera’s can write the JPEG to the memory card much quicker than Raw files.
There are, however, a few downsides to compressing JPEGs, which I explain below.
Compression discards some data.
One of the downsides to the small files size is the type of compression that is used. The compression algorithm is “lossy”, which means data is discarded when the file is compressed. For the most part, however, you won’t notice any loss of data – unless you start to edit the file.
JPEG files contain 8-bits (256 tones) of data for red, green, and blue. This provides 16.7 million colours. While this is more than enough for viewing the photo, it can be limiting once you start editing and adjust the colours. With enough changes, you will start to see banding in the histrogram of the image. Banding occurs when there are no pixels values in some of the tonal values, and looks comb-like in the histrogram.
Digital camera’s sold today have the ability to capture 10-,12-,14-bits of data which provides more overhead for editing.
Artifacts can appear with more compression.
For the most part, you want to use as little compression as possible with your JPEG files. The more compression you use, the more artifacts may appear. These usually look like “smudges” in the image, and can really reduce the quality of the image. When saving JPEG images for printing, I usually set the compression level to the highest quality setting, which creates a great image without any artifacts.
No editing required to print.
If you aren’t into photo editing, and would just like to print your images, you can do so without converting to another file format. JPEG files can be printed directly from your camera without first editing the pictures.
Processed within the camera.
The one downside to the point above, is that all the settings from the digital camera have already been applied to the JPEG. This can be a downside if, for example, you had the wrong colour balance set, then your digital pictures would have a colour cast to them. As mentioned above, while you could edit the photos to remove the colour cast, you may also have issue with banding. With JPEGs you must ensure all the settings in your camera are accurate for what you want to produce. With black-and-white settings in the camera, you lose all colour information when using JPEG files.
In my next post, I will look at the advantages and disadvantages of using Raw files.
Which file format do you use, and why?
What other points regarding JPEG files can be added to the above list?