SpinRite is a popular hard drive maintenance and data recovery software from Gibson Research Corporation, and costs $90 to own. While I haven’t extensively used the software, it has helped me recover data from hard drives when I thought the data was lost. It is a small application, and you also don’t need a powerful PC to use the application.
The once aspect of SpinRite that makes it different from other drive maintenance and data recovery tools is that you are required to boot up your computer using SpinRite to launch the application. SpinRite loads a copy of FreeDOS, detects the disks on your system and then allows you to perform specific scans of the disks.
Of course, if you need to scan a hard drive, you will usually need to connect it to either the IDE your SATA interface within your computer, which requires you to open up computer, and then connect the hard drive to the correct interface so the FreeDOS operating system can find your hard drive. In order for you to connect the drive to the USB port of you computer requires you to load the USB drivers within FreeDOS in order for the hard drive to be detected.
The alternative is to use a virtual system created by software such as VirtualBox to automatically setup and use a hard drive that is connected to a USB port. While the scanning may not be quite a fast, it is much easier to simply connect a hard drive to a USB port and then have SpinRite scan the hard drive in a virtual system.
I outline the steps that you need to follow to run SpinRite in VirtualBox.
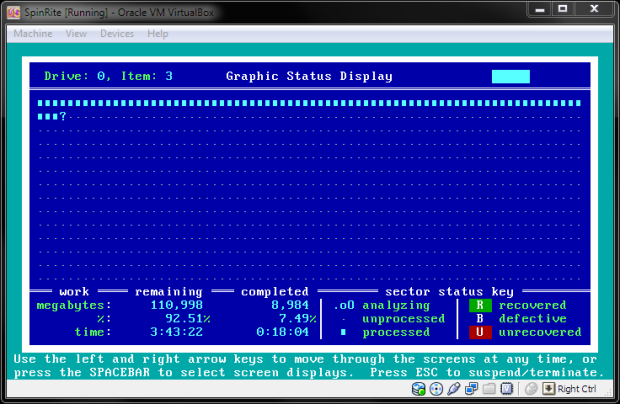
Setup the Virtual Drive
In order to scan a hard drive with SpinRite from within a virtual system in VirtualBox, you will first need to create a virtual hard drive. This virtual hard drive will essentially be the hard drive you want to scan. You will not be booting the virtual system from this drive, as this will be handled by SpinRite.
The steps below outline how to create a virtual hard drive.
Note
I am using Windows 7, so the steps below describe what I do on Windows 7. For other versions of Windows, you may need to adjust the steps a bit to get it to work, but the steps should be very similar.
Create the SpinRite ISO
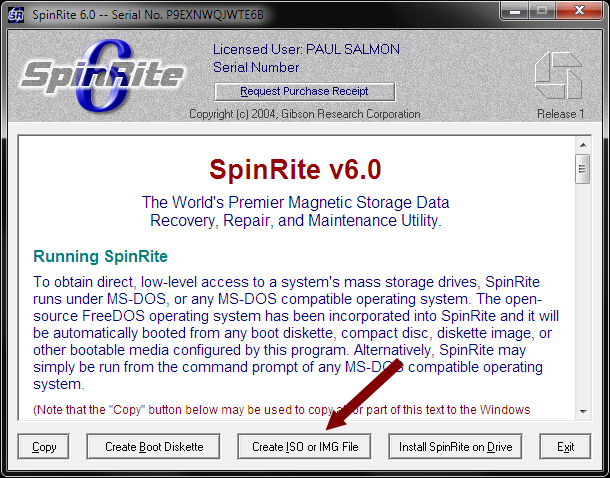
We will need to create the SpinRite ISO file that will be loaded by the virtual machine. This is easily done from within SpinRite:
- Run SpinRite and then click the “Create ISO or IMG File” button.
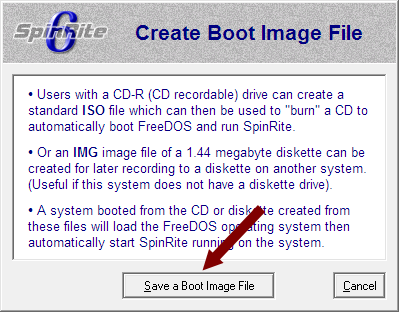
- Click the “Save a Boot Image File” button and select the location where you want to save the ISO file.
- Once the image file is created, you will be shown a confirmation message. Click the “Close” button to close the windows.
- Click the “Exit” button to close SpinRite.
Get the Hard Disk Number
Before we create the virtual machine, you will need to get the hard disk number for the hard disk you will scan with SpinRite. Use the following steps to get the hard disk number:
- Connect the hard disk to your computer, which is called the host machine.
- Once the hard drive is connected, you will need to find the disk number. This is easily done with the following steps:
- Bring up the Windows Start menu, and enter “Computer Management” in the search box.
- From the list of search results, right-click “Computer Management” and then select “Run as administrator” from the menu. Enter the administrator password, if required.
- From “Computer Management”, expand the “Storage” item on the left, and then select the “Disk Management” option.
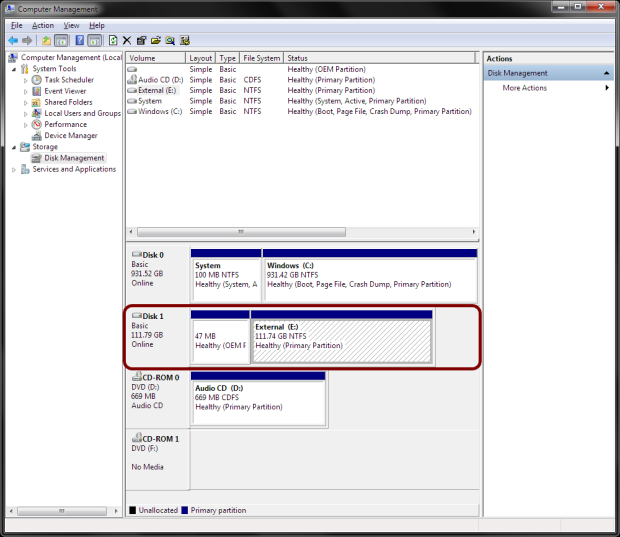
- in the middle part of the window you will see a list of drives that are connect to your computer. In the bottom half you will see the disk numbers for you hard drives. In my case, as shown in the image below, I will be scanning “Disk 1” (drive E). You will need to find the disk number for your drive in the same fashion.
Create the Virtual Machine
- Once you have the disk number, open the Start menu and enter “cmd” in the search box. Right-click “cmd.exe” from the search results and select “Run as administrator”, and enter the administrator password, if required.
- Navigate to the folder where VirtualBox is installed. For me, I would enter the following:
- Now you will need to create a raw disk of the hard drive you want to scan that will be used with virtual box. The command you need to run is as follows:
vboxManage internalcommands createrawvmdk -filename "[raw disk filename path]" -rawdisk "\\.\PhysicalDrive[disk number]"
For example, I will use the following:
vboxManage internalcommands createrawvmdk -filename "C:\Users\Public\Documents\VirtualBox\Raw Disk Images\laptopdisk.vmdk" -rawdisk "\\.\PhysicalDrive1" - Once you have created a raw disk, you will now need to start VirtualBox by right-clicking on the VirtualBox shortcut and select the “Run as administrator” option.
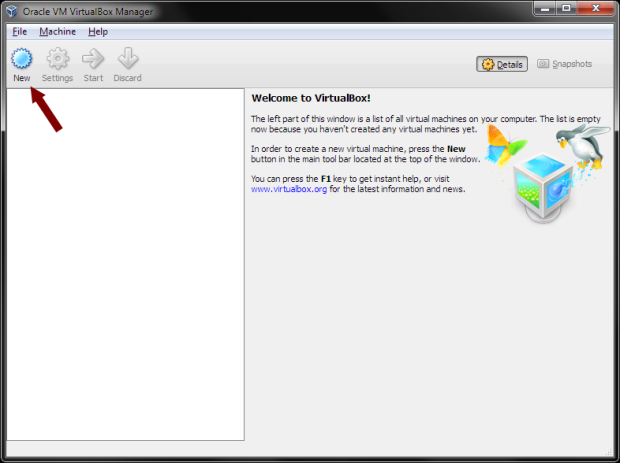
- After VirtualBox is loaded, click “New” in the toolbar.
- In the “Create New Virtual Machine” dialog, click the “Next” button.
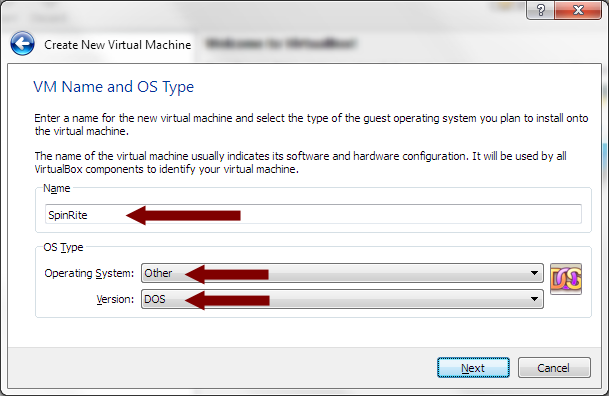
- In the “VM Name and OS Type” dialog enter the following:
- Name: Enter a name for your virtual machine.
- Operating System: Other
- Version: DOS
Click “Next” to continue.
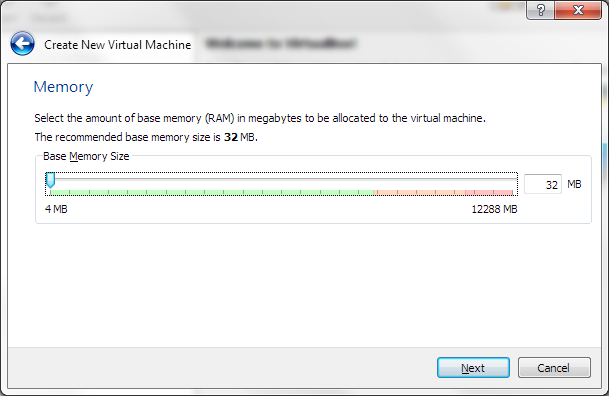
- For memory, you can accept the default or increase it if you wish. For me, I haven’t had any issues with using 32-128 MB of memory. Click “Next” to continue.
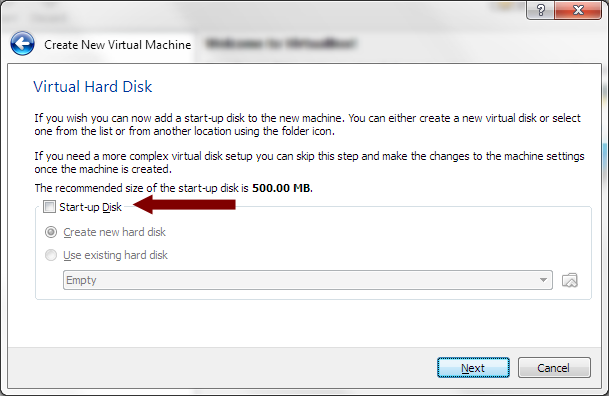
- In the “Virtual Hard Disk” dialog, uncheck “Start-up Disk” because you will be boot the virtual machine using SpinRite. Click “Next” to continue.
- If you get a warning message about not attaching a hard disk to the virtual machine, just click the “Continue” button.
- You will now be shown a “Summary” window. Click the “Create” button to create the virtual machine.
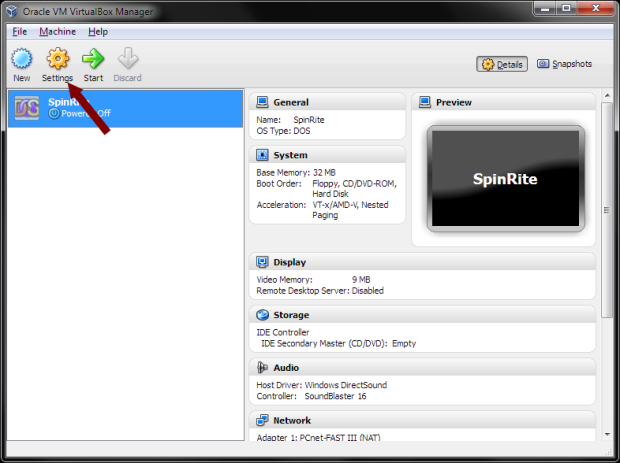
- Once the VirtualBox window is back, click the “Settings” option from the toolbar.
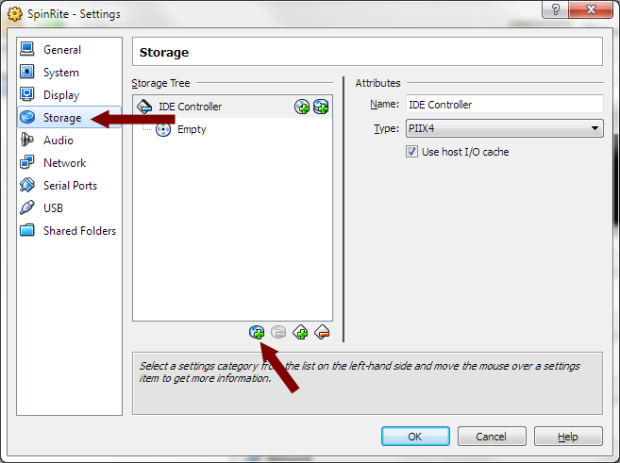
- From the options on the left, click “Storage” and then the “add new attachment” icon.
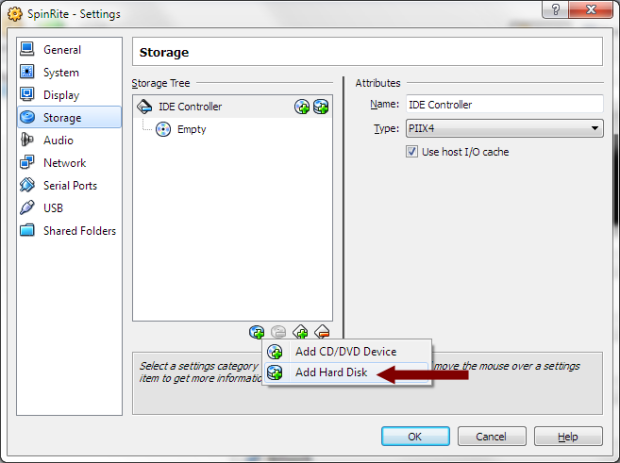
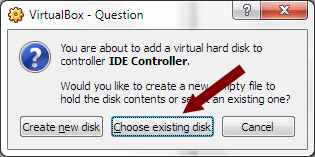
- Click the “Add Hard Disk” option.
- Click the “Choose existing disk” button.
- Select the raw disk in step 3 above and click the “Open” button. The raw disk you created should now appear in the list of storage devices.
- Now we will add the SpinRite ISO as a CD-ROM. Click the “add attachment” icon, again.
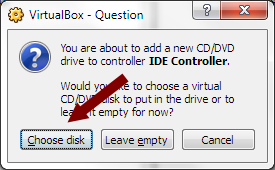
- Click the “Add CD/DVD Device”option.
- In the next question dialog, click the “Choose disk” button.
- Navigate to the SpinRite.iso you create in the first section, select the file and click the “Open” button.
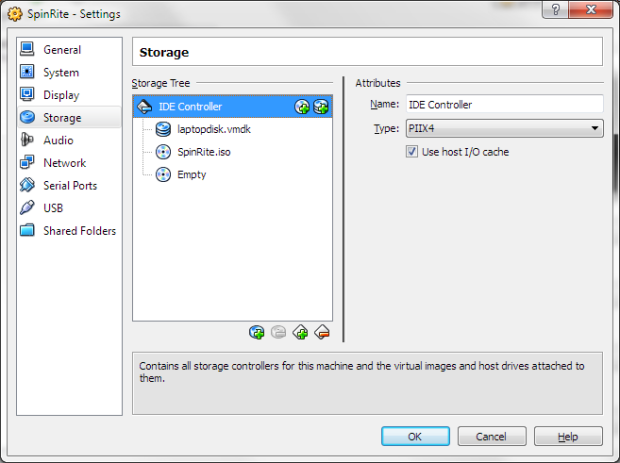
- Once the hard drisk and the ISO (CD-ROM) storage devices have been added, they should now appear in the “Storage Tree” list.
- Click the “OK” button to close the “Settings” window.
- Click the “Start: button from the toolbar to start your virtual machine.
- SpinRite should load automatically within your virtual machine. If it doesn’t select “Devices->CD/DVD Devices->(The IDE controller of your CD/DVD you added)->SpinRite.iso” to load SpinRite.
- You can now run SpinRite to scan your hard disk.
SpinRite Critical Error Solution
When I tried to run SpinRite to scan my hard drive within a virtual machine, I ran into an issue. SpinRite produced the following error:
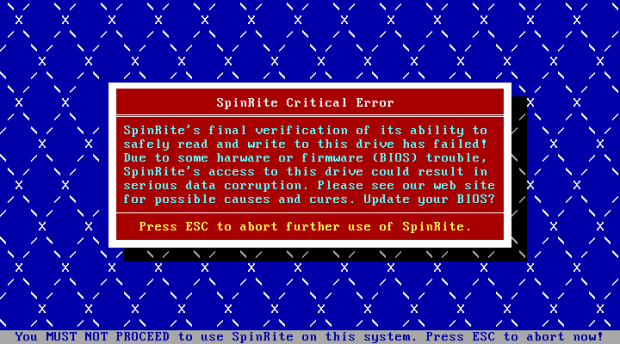
The problem appears because Windows appears to have “locked” the hard disk in some manner which prevents the virtual machine from gaining exclusive access to the hard disk. This problem is solved by using the following steps:
- Close all applications that are accessing the hard disk.
- Once you have the disk number, open the Start menu and enter “cmd” in the search box. Right-click “cmd.exe” from the search results and select “Run as administrator”, and enter the administrator password, if required.
- At the command prompt, run the following command:
diskpart
- The “DISKPART” tool will load, and show “DISKPART>” as the prompt.
- Using the same disk number as above, enter the following:
select disk [hard disk number]
For example, in my case the hard disk was “disk 1”, so I would use the following command:
select disk 1A message should be displayed that your disk has been selected. The following commands will now only act on that disk.
- Enter the following command to take the disk offline:
offline disk
A confirmation message should be displayed.
- Next we will clear the read-only attribute using the following command:
attributes disk clear readonly
A confirmation message should be displayed.
- Type the following to exit the DiskPart utility:
exit
Once you have completed running the above command, you should now be able to scan the hard disk with SpinRite from within a virtual machine within VirtualBox.
