If you own a web site or blog, chances are you have thought about how to make your pages load as fast as possible. This is an obsession with many, while a learning experiencing for others. I am one of those that look for ways to make my blog display faster. I have tried and used many different tactics, including changing settings for the browser cache, gzip compression, WordPress caching plugins, reducing the number of graphics, and reducing the number of third-party widgets that appear on my blog. The more that has to load, the slower a page will become.
When I created this new WordPress theme, I wanted to try something new – CSS sprites. CSS sprites are used by some of the larger web sites to reduce the number of image downloads that are needed to display a web page. While I am not an expert by any means, I have managed to get some of the common images that appear on this blog to load from an image sprite.
What is a Sprite?

First, get the soft drink out of your head and focus on images. When computers first started appearing in homes they weren’t very powerful, had little memory, and little hard drive space. To reduce overhead, many game manufacturers would combine the different images in a game into a single image file. When a single image was required, that image was referenced within the larger image file. They did this because they new the location, in terms of pixels, where that image was located in that file.
Sprites, or CSS sprites as they are commonly referred as, work in a similar fashion. You combine some, or all if you can, images that are displayed by your web site into a single image file. To display a single image from that file, you basically specify an offset location. It does take some time to learn how to best use CSS sprites, but once you use them they become easier.
The images you see in the header of this blog are from a single CSS sprite file. The logo, green header background, and the social media icons are all stored in one large image file – a PNG file. The footer background is also stored in that same PNG file, as well. Separately, the images required a visitor to download six different image files, for a total of 85 KB. Using the single sprite PNG file requires a visitor to download 2 files (you’ll see why it isn’t one file later), that total 45 KB – which is a reduction in both download size and the number of downloads. This is how CSS sprites can speed up your site – by reducing the number of files downloaded and reducing the size of the combined downloads.
To help you get started with using CSS sprites feel free to follow the tutorial I outline below. There is a link to a zip file that contains all the files that I have used in this tutorial at the end of this post.
Using CSS Sprites
For me, the most complex part of using sprites is creating the single image file. Any image editor can be used, as pretty much the only requirement is being able to save a PNG file. A PNG file is used because it provides good compression, supports 8-bit or 24-bit colours, and also supports transparency.
The example that I will be using will be to display eight different social media icons, as hyperlinks, in a web page. All eight icon images will be read in from a single CSS sprite PNG file, called “social-icons.png”, as shown below.

To use images in sprites, you need to specify both a width and height for each image used. This will help to determine the offset location of each image. In my case, all the images are exactly 64 pixels by 64 pixels as shown below. (I included the borders in the next few images to make it easier to see the separate images in the file. It is up to you whether you want to include borders or not.)

Now that we have a CSS Sprite PNG file created with the eight social media icons, and we know the dimensions of each icon, we can start to display each individual image in a web page.
- Open up your image editor and create a single pixel file with a transparent background. Save this file as “transparent.gif”. You will be using this file later.
- Start by creating both a Web page (for this example, a simple HTML file is sufficient), and a stylesheet (CSS) file. Have your Web page call your CSS file so it loads the styles from that file.
- At the top of the CSS file enter the following code:
.sprite{background:url(./social-icons.png);}
Note:
Ensure you specify the correct location of your image files. In my example, all the image files and the CSS file are located in the same directory as the HTML file.
This class will be used to set all the backgrounds for the social media icons to the PNG file. From there, we will specify the offset of each image to display the correct image.
- Now I will begin to specify the location of each image in the file. To specify the offset of each image, you need to determine how far the top-left corner of each image is from the top-left point of the entire image. It may sound confusing, so let’s look at a few images.
Specifying the Image Offset
- Let’s start with the easy image – the RSS feed icon (first icon on the left in the top row). Since this icon begins at the top-left corner of the sprite image, you can add the following code in your CSS file:
.rss-icon{background-position:0 0;}
The background-position attribute is specified as “background-position:x, y;”.
- Next we will move on to the second image from the left in the top row: the Twitter icon. This image starts at the 64th pixel from the left, and is at the top of the image. We now need to “move” the top-left corner of the twitter image to the top-left corner of the sprite image, so we specify the following in the CSS file:
.twitter-icon{background-position:-64px 0;}
- You can create similar CSS code for the remaining icons on the top row by specifying the x, y coordinates. Now let’s look at an icon in the second row. Let’s create the CSS code to properly display the Delicious icon, the second from the left in the bottom row. The top-left corner of this image is 64 pixels from the left side of the sprite image, and 64 pixels from the top of the sprite image. This means that you will need to add the following code to your CSS file:
.delicious-icon{background-position:-64px -64px;}
The image below shows how the values for the background-position were obtained for both the Twitter and Delicious images.

CSS Sprite – Image Offsets - Continue to add the remaining images to your CSS file. If you are unsure, here is what I had in my CSS file for the images:
.rss-icon{background-position:0 0;}
.twitter-icon{background-position:-64px 0;}
.digg-icon{background-position:-128px 0;}
.stumbleupon-icon{background-position:-192px 0;}
.facebook-icon{background-position:0 -64px;}
.delicious-icon{background-position:-64px -64px;}
.flickr-icon{background-position:-128px -64px;}
.technorati-icon{background-position:-192px -64px;}
- Let’s start with the easy image – the RSS feed icon (first icon on the left in the top row). Since this icon begins at the top-left corner of the sprite image, you can add the following code in your CSS file:
- Once you have the sprite and the image classes defined, let’s display them in your HTML document. Open up your HTML file in an editor.
- We will now use that “transparent.gif” file you created in step 1. Since your social media images are stored in a PNG sprite image, and are set as a background, we will use the transparent.gif file as the actual image that is called in your HTML file. So to do this, insert the following HTML code:
<p>RSS Icon: <a href="#"><img src="transparent.gif" alt="RSS Icon" height="64" width="64" /></a></p>
<p>Twitter Icon: <a href="#"><img src="transparent.gif" alt="Twitter Icon" height="64" width="64" /></a></p>
<p>Digg Icon: <a href="#"><img src="transparent.gif" alt="Digg Icon" height="64" width="64" /></a></p>
<p>StumbleUpon Icon: <a href="#"><img src="transparent.gif" alt="StumbleUpon Icon" height="64" width="64" /></a></p>
<p>Facebook Icon: <a href="#"><img src="transparent.gif" alt="Facebook Icon" height="64" width="64" /></a></p>
<p>Delicious Icon: <a href="#"><img src="transparent.gif" alt="Delicious Icon" height="64" width="64" /></a></p>
<p>Flickr Icon: <a href="#"><img src="transparent.gif" alt="Flickr Icon" height="64" width="64" /></a></p>
<p>Technorati Icon: <a href="#"><img src="transparent.gif" alt="Technorati Icon" height="64" width="64" /></a></p>You will notice that I specified the height and width of each icon. This is important as it will cause the browser to only display 64×64 pixels of the sprite that we defined. Also, the reason we use a transparent GIF file is to allow the background image to show through.
- Now we will assign the background sprite to each of the images defined in the HTML file. To do this we specify the class for each image as follows (shown in red):
<p>RSS Icon: <a href="#"><img src="transparent.gif" alt="RSS Icon" height="64" width="64" class="sprite" /></a></p>
<p>Twitter Icon: <a href="#"><img src="transparent.gif" alt="Twitter Icon" height="64" width="64" class="sprite" /></a></p>
<p>Digg Icon: <a href="#"><img src="transparent.gif" alt="Digg Icon" height="64" width="64" class="sprite" /></a></p>
<p>StumbleUpon Icon: <a href="#"><img src="transparent.gif" alt="StumbleUpon Icon" height="64" width="64" class="sprite" /></a></p>
<p>Facebook Icon: <a href="#"><img src="transparent.gif" alt="Facebook Icon" height="64" width="64" class="sprite" /></a></p>
<p>Delicious Icon: <a href="#"><img src="transparent.gif" alt="Delicious Icon" height="64" width="64" class="sprite" /></a></p>
<p>Flickr Icon: <a href="#"><img src="transparent.gif" alt="Flickr Icon" height="64" width="64" class="sprite" /></a></p>
<p>Technorati Icon: <a href="#"><img src="transparent.gif" alt="Technorati Icon" height="64" width="64" class="sprite" /></a></p>By adding the class, the browser will use the CSS sprite PNG file as the background. Since we haven’t yet specified the specific class for each social media icon, you will only see the RSS feed icon for each link because it is located at the top-left corner of the sprite file. Let’s change that next.
- We now need to also specify each individual class, that we created earlier, for the icons so they display the correct icon. To do this we add the remaining classes (shown in red):
<p>RSS Icon: <a href="#"><img src="transparent.gif" alt="RSS Icon" height="64" width="64" class="sprite rss-icon" /></a></p>
<p>Twitter Icon: <a href="#"><img src="transparent.gif" alt="Twitter Icon" height="64" width="64" class="sprite twitter-icon" /></a></p>
<p>Digg Icon: <a href="#"><img src="transparent.gif" alt="Digg Icon" height="64" width="64" class="sprite digg-icon" /></a></p>
<p>StumbleUpon Icon: <a href="#"><img src="transparent.gif" alt="StumbleUpon Icon" height="64" width="64" class="sprite stumbleupon-icon" /></a></p>
<p>Facebook Icon: <a href="#"><img src="transparent.gif" alt="Facebook Icon" height="64" width="64" class="sprite facebook-icon" /></a></p>
<p>Delicious Icon: <a href="#"><img src="transparent.gif" alt="Delicious Icon" height="64" width="64" class="sprite delicious-icon" /></a></p>
<p>Flickr Icon: <a href="#"><img src="transparent.gif" alt="Flickr Icon" height="64" width="64" class="sprite flickr-icon" /></a></p>
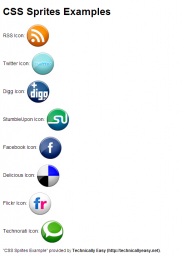
<p>Technorati Icon: <a href="#"><img src="transparent.gif" alt="Technorati Icon" height="64" width="64" class="sprite technorati-icon" /></a></p> - Now save your HTML file and then open it up in a Web browser. If all code was entered correctly you should see all the correct social media icons on the Web page, each being a hyperlink. An example is show below.

(Click to enlarge)
If you try to save the images directly from the web pages, you will get the transparent GIF file since that image is what is actually linked. Remember, the sprite image is the background image, not the actual hyperlinked image.
While it can take some time to get used to working with sprites, there are a couple reasons why you may want to incorporate them into your web site design:
- Reduces the number of files needed to be downloaded from your web site. For my blog, I went from 6 separate images down to 2 separate images.
- Reduces the size of the downloads. By using a sprite, the images downloads went from 6 files that were 85 KB down to two files that were 45 KB.
With the above benefits, you may want to explore, and learn about using CSS sprites.
You can download the files used in this tutorial here: CSS Sprites Example Files.
