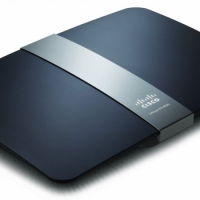
Wireless routers, by default, are unsecured when you connect a router for the first time. This is important to know as you will need to take the necessary steps to secure any wireless router that you have just purchased.
With regards to Linksys routers, the steps to secure the router are very similar, so if you have trouble finding proper steps to secure your Linksys router, you can usually follow steps for another Linksys router.
To make it easier for owners of the Linksys EA4500 wireless router, I will provide the steps to secure the router below.
Steps to Secure the Linksys EA4500 Wireless Router
If you have owned a Linksys router in the past, the steps I outline below make look familiar, that is because the firmware that is included with the various Linksys routers look very similar.
I have divided the steps into several sections to make it easier to follow, and to indicate what tasks each group of steps perform.
Loading the Router’s Web Interface
Before securing your Linksys EA4500 you will need to access the Web interface. This is done by opening a Web browser and navigating to the router’s Web interface.
Note:
I suggest that you use Internet Explorer, if available, to access the Web interface. Many users have reported problems with accessing the Web interface for a router with other Web browsers.
- Open you Web browser and then enter 192.168.1.1 in the address bar.
- The router will then prompt for a user name and password. Leave the user name field blank, and type “admin” (without the quotes) in the password field.
Change the Router Password
Once you have access to the Web interface, the first steps you should perform are to reset the password needed to access the Web interface. Unfortunately, you can’t change the user name with the stock firmware, buy making the password long and complex should provide enough protection.
- Click the “Administration” tab from the menu at the top.
- Next, if the “Management” page isn’t display, then click the “Management” link at the top.
- In the “Router Access” section, enter a new password for the router, and then enter the same password in the second field to confirm.
- Click the “Save Settings” button at the bottom.
- The router will then save the new password, and you will be required to re-login again with the new password. The user name will still be blank.
Setup the Wireless Network
The steps outlined in this section are probably the most important steps to follow. These steps will secure your wireless networks from unauthorized users. Failure to perform these steps will allow anyone access to your wireless network.
The Linksys EA4500 allows devices to connect to it on either the 2.4 GHz or 5 GHz frequency. In order to make a device connect to either frequency without having to change networks, we will be making both frequencies use the same network name (SSID).
- Log into the router, if you haven’t already done so, and then click the “Wireless” tab at the top.
- By default, Wi-Fi Protected Setup (WPS) is selected, which is unfortunate because WPS is not secure. Click the “Manual” option to switch from WPS.
- For both the 5 GHz and 2.4 GHz sections use the following settings:
- Network Name (SSID): The name for your network. This is the name that will appear in the list of wireless networks that can be detected by wireless devices.
- Security Mode: WPA2 Personal or WPA Personal.
- Passphrase: Enter a long and complex string of characters, numbers and symbols. This is the most important element to secure your wireless network.
- Click the “Save Settings” button at the bottom to save your security settings.
After you perform the steps outlined in “Setup the Wireless Network”, you can then select you wireless network from the list of available networks and then enter the passphrase that you have created. Anyone that connects to the wireless router will need to enter this passphrase – unless you setup guest access within the router.
At this point your Linksys EA4500 wireless router is secured, and no unauthorized users should be able to gain access to your network or router.
