After signing up with the Incapsula service, you will then be required to setup Incapsula to work properly with your web site. While it may seem complex, the setup requires you to change DNS settings for your site to point to the Incapsula servers.
The steps outlined below in this post show you how to setup Incapsula using your host’s cPanel. If you use something other than cPanel, the basic concepts are the same, but the actual steps may be different.

Steps to Setup Incapsula
After you sign up with Incapsula, you will be given the opportunity to add your web site to their service. To setup Incapsula to use the service, use the following steps:
- Login to Incapsula. You should see your “My Sites” page.
- In the “Add a Website” section, type in the domain you would like to add and click the “Next” button.
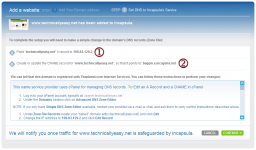
- Incapsula will go and get information about your site. Once it is done, it will display the addresses that you will need to setup Incapsula with your web site. The screenshot below shows where you can find the information – marked as 1 and 2.
- Once you have this information, open a new window and log into your web site’s host account. In the “Domains” section, click the “Advanced DNS Zone Editor” icon.
- Within the “Advanced DNS Zone Editor”, do the following steps:
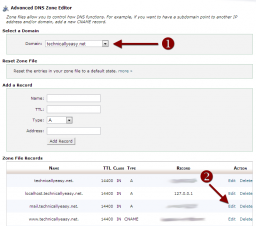
- Select your domain from the dropdown list at the top.
- In the “Zone File Records” section, click the “Edit” link beside the domain name in the list, as shown below.
- When the edit options are displayed, enter the IP address that was displayed in the Incapsula setup instructions.
- Click the “Edit Record” button to save your changes.
- Next, click the “Edit” link next to the “www” version of your domain.
- Once the edit options appear, enter the second address provided by Incapsula into the “Address” field.
- Click the “Edit Record” button to save your changes.

cPanel Advanced DNS Zone Editor – Edit Domain
(Click to enlarge)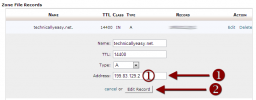
cPanel Advanced DNS Zone Editor – Edit Domain Address
(Click to enlarge)
cPanel Advanced DNS Zone Editor – WWW Domain Edit
(Click to enlarge) - Once the changes are made, return to the Incapsula window and click the “Continue” button to finish the steps to setup Incapsula.
(Click to enlarge)

(Click to enlarge)
When setup Incapsula I had an issue arise with regards to my blog’s e-mail. I outline the issue and the steps I took to solve the issue below.
E-mail Issues
When I had setup Incapsula, all traffic that was going to my blog went through the Incapsula servers. The problem was my e-mail was also redirected through the Incapsula servers, which caused problems.
The problems ocurred when someone sent me an e-mail. After some time they would receive a timeout error and the e-mail wouldn’t go through. After some investigating I realized that I had to change a few more settings to solve this problem.
Setup Incapsula – Steps to Solve E-mail Timeout
The steps I used to solved my blog’s e-mail timeout are as follows:
- Log into your host account and click the “Advanced DNS Zone Editor” icon in the “Domains” section.
- Click the “Edit” link next to the “mail.yourdomain.com” version of your domain. The screenshot below shows an example.
- When the edit fields are displayed, enter the IP address for your host in the “Address” field.
- Click the “Edit Record” button to save your changes.
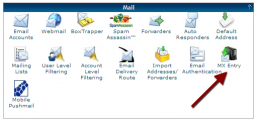
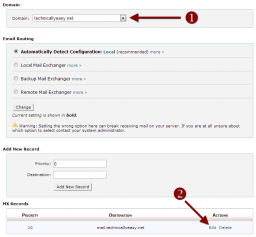
- Now we need to ensure your mail exchange (mx) entry is pointing to the correct domain, in this case “mail.yourdomain.com”. To do this, click the “MX Entry” icon in the “Mail” section of your host’s dashboard.
- From the domain dropdown list, select the domain you would like to edit.
- Under the “MX Records” section, click the “Edit” link next to the item that has the lowest priority number, if there are more than one entries.
- The edit fields should now be displayed. In the “Destination” field enter the “mail.yourdomain.com” domain.
- Click the “Edit” button to save your changes.

(Click to enlarge)
(Click to enlarge)

(Click to enlarge)
(Click to enlarge)
Once this is done, your email should go through the mail server on your host, and not the Incapsula servers. This post outlined the steps you need to take when using cPanel to setup Incapsula.

