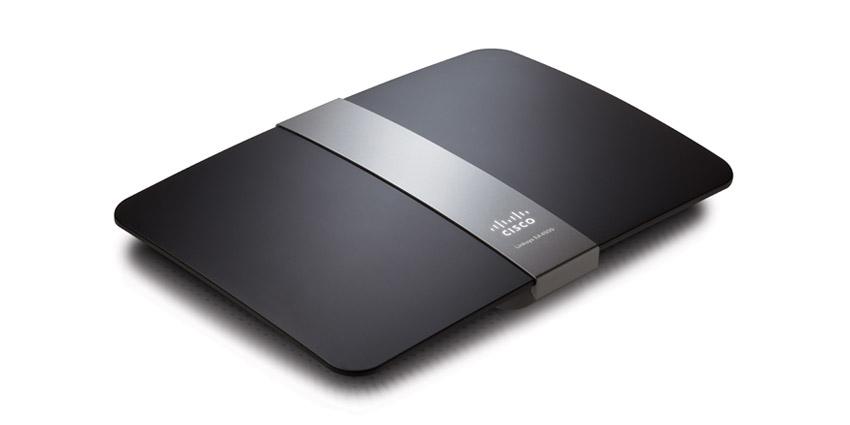
As with any wireless router, it is important that you ensure you secure the Linksys E4200 wireless router to prevent unauthorized users from accessing your network. Ensuring that your wireless router is secure is the first step to keeping your data and private information safe.
Included with this router is a CD-ROM that contains the Cisco Connect software that allows you to setup your router. This post, however, will provide the manual steps you can take to manually secure the Linksys E4200 wireless router.
Steps to Secure the Linksys E4200 Wireless Router
The steps outlined below will help you to secure the Linksys E4200 wireless router. Ensure you follow the steps exactly, and if you think you have missed a step, or are having problems, you can always reset the router back to factory defaults and start again.
Note:
When accessing the router’s administrative web pages, I recommend that you use Internet Explorer if it is installed. It seems many of the administrative pages in routers tend to be more compatible with Internet Explorer.
- Open up your web browser and then go to 192.168.1.1.
- When the router prompts you for a user name and password, leave the user name blank and type “admin” as the password.
Change the Router Password
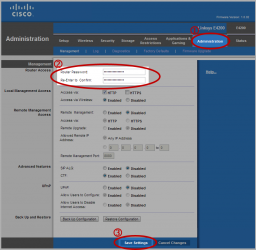
- Click the “Administration” tab the top, and then click “Management”.
- In the “Router Access” section, enter a new password for your login, and then enter the same password a second time to confirm it.
- Click the “Save Settings” button and then re-login with the new password. The user name will still be blank.

(Click to enlarge)
Set Network Name
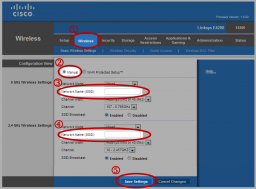
- Click the “Wireless” tab, which should display the “Basic Wireless Settings” page.
- Select “Manual” for “Configuration View”.
- In the “Network Name (SSID)” field, in the 5 GHz Wireless settings section, enter a name for your network.
- In the “Network Name (SSID)” field, in the 2.4 GHz Wireless settings section, enter a name for your network.
- Click the “Save Settings” button.
Note:
You can use the same network name for both the 5 GHz and 2.4 Ghz settings. Doing so will allow devices to use either frequency band when connecting.

(Click to enlarge)
Secure the Linksys E4200 Wireless Router
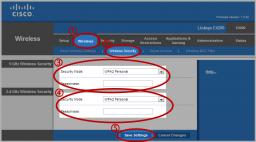
- Click the “Wireless” tab.
- Next, click the “Wireless Security” option.
- In the 5 GHz section, for the “Security Mode” drop-down list, select “WPA2 Personal” or “WPA2/WPA Mixed Mode” for the best security, and enter a long passphrase that will be used to connect to your wireless network.
- Repeat the same steps for the 2.4 GHz section. If you used the same network name for both the 5.5 GHz and 2.4 GHz, then use the same passphrase, otherwise you can specify a different passphrase.
- Click the “Save Settings” button.
Note:
When creating a passphrase the length of the passphrase is important. The longer the passphrase, the better.

(Click to enlarge)
After following the above steps, you should now have a secured router. If you have problems in the future, you can reset the router and follow the steps again to secure the Linksys E4200 wireless router.
