There is a lot of information about how you can keep your WordPress blog secure and safe from hackers. Such tips involve keeping your WordPress veresion and plugins updated, as well as backing up all your blog files and database.
From a slightly different perspective, you may also want to take steps to ensure you protect your WordPress login to ensure any unauthorized visitor can gain access to your entire blog. There are several things you can do to help keep the login secure, all that I have done on my blog as well.

1. Change the Administrative User
This tip is usually one that appears on almost all articles and posts related to WordPress security, and is a a big one. When you setup your blog, never ever use “admin” as the user ID. In fact, you should use that ID in any form, such as “Admin” or “ADMIN.” This ID is probably the most tried ID by hackers to access a blog, so not using such an ID will stop many hackers.
2. Use a Strong Password
I have mentioned using strong passwords in the past, and it definitely applies to your WordPress blog. When creating a password, ensure that it is long and strong. Ensure you use alphanumeric (letters and numbers), as well as symbols in your password. I highly recommend you use a password management application, such as LastPass (the one I use), to generate long and unique passwords that you can then store in the management application.
3. Limit Login Attempts
By default, WordPress will allow someone attempt to login to your WordPress an unlimited number of times. There are plugins that can prevent someone from logging into your blog after a specified number of incorrect attempts. One such plugin called Limit Login Attempts will allow you to lockout someone for a specified number of minutes (default 20) after so many incorrect logins (default 4). After so many lockouts (default 4), the user can be locked out for a specified number of hours (default 24). The plugin can also provide a list of IP addresses of the user attempting the login as well as the user ID they used.
The image below shows the most recent log in attempts on Technically Easy. Notice how most of the attempts use some form of “admin” to try and gain access to my blog?

(Click to enlarge)
4. Implement Two-Factor Authentication
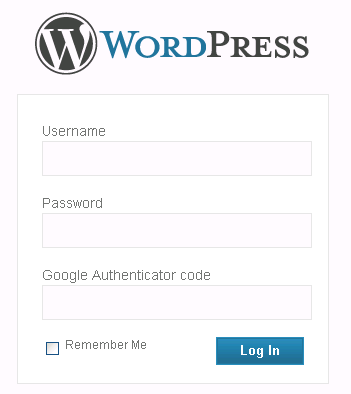
Two-factor authentication is becoming more popular each day, and there is good reason for it. Implementing two-factor authentication adds another level of security to a login. Basically, two-factor authentication adds another level of security because it requires a user to enter not only a user ID and password, but also another piece of information – information that can change every minute. For your WordPress blog you can implement two-factor authentication using a plugin called Google Authenticator.

This plugin will allow you to use the Google Authenticator mobile application (Android, iOS, and Blackberry), that generates a unique 6 digit number every minute. You will be required to enter this number each time you log into your blog, which adds another layer of security.
5. Limit User Roles
If you have multiple users registered on your blog, ensure you only provide the necessary access that they would need to perform their tasks. For example, for those that will only write posts, you would only need to assign those users to the “Contributor” role. This will limit what they can do in your blog in case an unauthorized user guesses the user ID and password of the user.
