Every once in a while I review products that interests me, especially products that are related to security. For many, anti-malware and anti-virus products tend to seem complex to use. Updating and scanning using such products can be intimidating, although newer versions tend to perform these functions automatically. The one thing that most anti-malware products have in common is that they required Windows to run in order to function. Unfortunately, when Windows runs so does the malware and viruses that may have infected the computer
What if an anti-malware product is available that will automatically update itself, and then perform a full system scan outside of Windows? What if this product requires you to only run a single file within Windows, and then click a single button and have everything done for you? This is what interested me about a particular product called FixeMeStick.

A USB Stick That Protects Your Computer
I always have an anti-virus and software firewall running on my computer, and keep all security software updated. I also ensure I only visit trusted sites, and keep Windows updated. Of course, even following such steps it is still possible for my computer to be infected with some adware or malware. While the type I do get isn’t very harmful, there are others that can do much more harm – think identity theft or preventing Windows from booting.
If you have malware that prevents Window from booting, then besides performing some very technical steps, it could be difficult getting your computer to restart. Another option is to remove the malware outside of Windows and then try and boot into Windows. Such an option exists with FixMeStick.
FixMeStick is a product that incorporates some of the best anti-malware and anti-virus engines on the planet into a compact USB flash drive. While this may sound complex, they creators of FixMeStick have made it dead simple to use.
The basic premise is that you insert the FixMeStick device into a USB port on your computer. From there you run an application and following the instructions. The software on the device will then do all the work of updating its malware definitions, scanning your computer and then reporting the results.
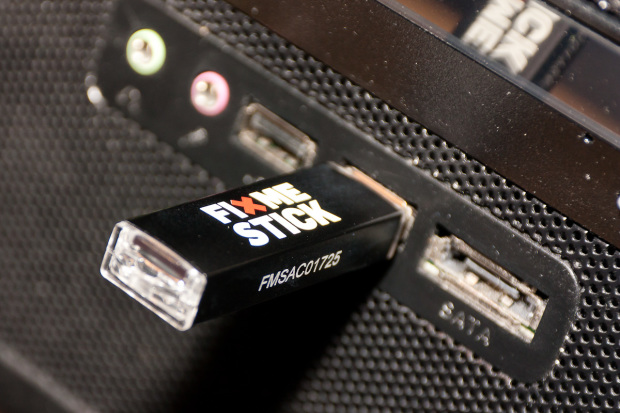
While the above steps may sound too simple, in reality, that is all that is required to use the product.
Using FixMeStick
I mentioned how easy it is to use FixMeStick, now below are the actual steps included with the product. FixMeStick includes a card with the product that outlines the two methods of using the device – each method involves only three steps.
Method 1: Getting Started
- Insert the FixMeStick into a PC USB slot.
- Within Windows, open Windows Explorer and click on the drive containing FixMeStick – it is labeled “FixMeStick.”
- Double-click the “Run FixMeStick” file and then follow the instructions.
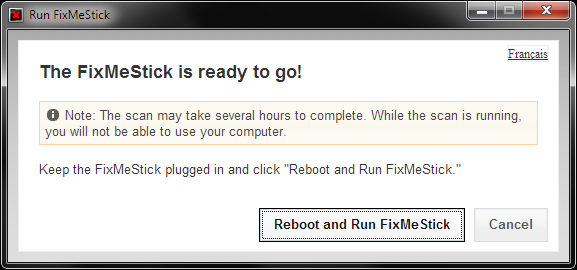
Method 2: Advanced Users
- Insert the FixMeStick into a PC USB slot.
- Reboot your computer.
- Change the BIOS boot order to load from the USB slot first.
Using either method will cause your computer to reboot and then run the software on the FixMeStick device. The software will then go through a series of steps to scan your computer for malware.
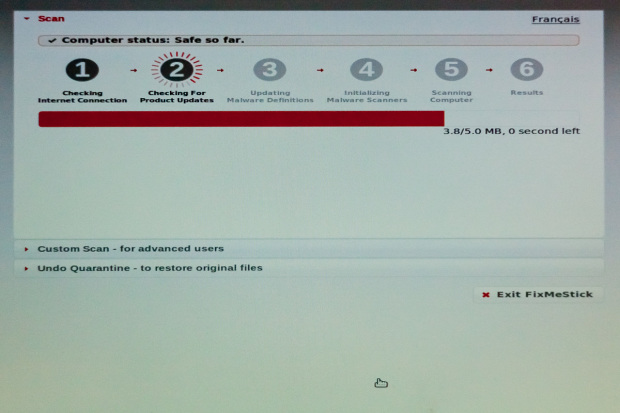
- 1. Checking Internet Connection
- This is the first step and verifies that the device can connect to the Internet. This is needed so the product updates and malware definitions can be downloaded and used to scan your computer.
- 2. Checking for Product Updates
- Since anti-virus and anti-malware products are constantly being updated, FixMeStick verifies that the version you are using is the latest version. If there is a newer version, then the software is updated automatically.
- 3. Updating Malware Definitions
- What good is an anti-malware product if the definitions (information on the malware) is out of date. This step will check to see if new definitions exist, and then download the latest definitions.
- 4. Initializing Malware Scanners
- Since there are multiple scanners used by the device – Kaspersky, VIPRE, and SOPHOS, it is important to ensure that all the scanners are ready to run before performing the actual scan.
- 5. Scanning Computer
- This is where the actual scan happens. This step can take several hours depending on how many files exist on your computer. Just let the scanners run.
- 6. Results
- Once the scanning is complete, the results from the scan are shown. From here you can determine what action to take if any malware is found.
All the above steps are automated, except for the Results step which requires you to indicate how to handle any malware that is found. While the scan is running there are two additional options that you can select = “Custom Scan” and “Undo Quarantine.”
The “Custom Scan” allows you to select which drives and folders to scan, so you don’t have to scan everything if you choose not to, while the “Undo Quarantine” provides the option to restore any files that you had quarantined from previous scans. The undo option is useful if you accidentally quarantined an important file and need to restore it back to its original folder.
Results of My Computer’s Scan
My computer has two hard drives in a RAID 0 configuration so they appear as a single drive in Windows. After inserting FixMeStick in the USB port I was wondering how it would handle the drives.
As it turned out, FixMeStick had no issues. I even expanded the “Custom Scan” option on the screen and noticed that FixMeStick managed to read my hard drives and display the entire folder structure. I didn’t use the “Custom Scan” option, but instead kept the scan on the default setting – scan all drives and folders.
The entire scan on my computer took 1 hour 55 minutes and 16 seconds. During that time FixMeStick scanned 386,365 items on my computer, which isn’t bad for performance. It managed to find some minor malware, which I quarantined.
Once I exited the program it automatically shutdown my computer, which allowed me to remove the FixMeStick device from the USB port before restarting my computer. My computer automatically restarted into Windows without any issues.
My Impressions
Overall, I am extremely impressed with FixMeStick. The creators have gone to great lengths to make it so easy to use the product. It doesn’t get any easier than loading a single program, clicking a button and then sit back and watch FixMeStick scan your computer for you.
FixMeStick is available on their website and also I found it available on Amazon. As of this post, there are 48 reviews for the device with 43 reviews giving the product 5 stars and 5 reviewers giving it 4. That is a testament to a quality product.
If I need to perform a scan on my computer in the future, I will definitely use FixMeStick.
