I have written several posts in the past about how I use VueScan to scan in old printed photographs, but never talked about how to profile a scanner in VueScan. While it took some getting used to, I have managed to create a VueScan scanning workflow that works for me. While everyone will have their own different workflow, the important thing to remember is that regardless of your workflow, you should take the time to profile a scanner in VueScan.
Why is it important to profile your scanner? Simple. All scanners don’t reproduce the same colours the same way. Even scanners that are the same model may have a minor variation of a specific colour. Profiling your scanner allows VueScan to produce scans that are as true to life as possible. While profiling your scanner may sound complicated, it isn’t difficult and I’ll step you through the process in this article.
Scan Properly: Profile a Scanner in VueScan
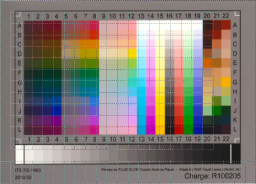
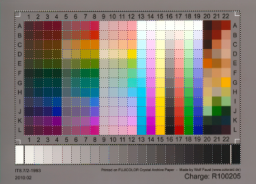
Before you profile your scanner you will first need to buy a IT8 calibration target. They aren’t expensive, and can be used to profile any scanner. I purchased by calibration target from Wolf Faust for $10 USD plus $10 USD shipping. The target was packaged in a sturdy cardboard envelope, and within a second sturdy envelope inside the cardboard one. The target itself was inside a plastic sleeve to protect it from dust.
Steps Needed to Profile a Scanner in VueScan
Once you have your IT8 target, you can use the following steps to profile a scanner in scanner:
- Place the IT8 target onto your flatbed scanner, as you would a photo. Turn on your scanner and then load VueScan.
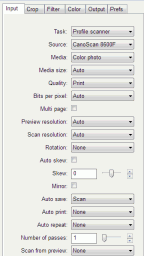
- Click the “Input” tab, and then select “Profile Scanner” from the “Task” dropdown option.
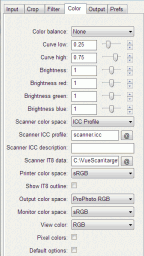
- Next, click the “Color” tab, and then click the “@” button next to “Scanner IT8 data” and select the IT8 description file.
- Click the “Preview” button to preview the IT8 target in your scanner.
- After the preview is displayed, a cropping mask will be displayed over the image. This mask will need to be adjusted to line up with your target. You can simply drag the border of the cropping mask so it matches your target. This step is important if you wish to profile a scanner in VueScan properly.
- Once the cropping mask is aligned with your target, click “Profile->Profile Scanner” from the top menu.
- A file called “scanner.icc” is created in the same folder as “vuescan.ini”.

(Click to enlarge)

(Click to enlarge)
Note:
The IT8 calibration target that I received from Wolf Faust didn’t come with a description file. The description files are available from the website where I ordered the target. If you don’t have a description file, check to see if you can download one from the website where you ordered your target.

(Click to enlarge)
(Click to enlarge)

(Click to enlarge)
When you want to scan a photo, you can specify the scanner ICC profile you created using the above steps. You specify the profile in the “Scanner ICC profile” option under the “Color” tab.
By using a profile, you can now scan photos with the correct colours with minimal adjustments needed. Getting the correct colours is one of the main reasons to understand how to profile a scanner in VueScan.

