A few months ago I updated the WP Super Cache plugin on Technically Easy and ran into a major issue. After updating, I didn’t check my blog to ensure that it was still up and running. The next day I logged into Technically Easy, and then attempted to view the blog. Sure enough, the blog wasn’t up – all I got was a blank screen. It had been down all night. Not realizing the problem at first, I began to think about what changes I had made.
The only thing I could think of was the update to the WP Super Cache plugin. I immediately disabled that plugin and recheck my blog. It appeared in my web browser instantly. The update to the plugin had prevent my blog from loading. From that point until a few weeks ago I hadn’t been using a cache plugin. I decided to once again look at plugins to cache my blog, but I wanted to see what other cache plugins existed before retrying WP Super Cache. I managed to find another plugin, and am currently using it on Technically Easy.
Do More Than Just Cache
A few weeks ago I installed the W3 Total Cache plugin. I was leary at first, but I tried it on another, low traffic, blog to ensure that I wouldn’t run into many problems. Once I installed the plugin and enabled it, I experienced no problems at all. I then installed it on Technically Easy, and verified it worked by loading my blog.
After finding out my blog still works, I decided to look at the options that are available for the plugin. There are several pages of options that you can modify to control how your blog is cached.
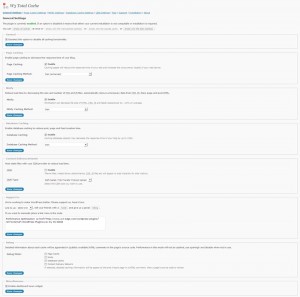
The W3 Total Cache plugin includes the following options:

(Click to enlarge)
- Page Caching. This one is obvious and allows you to cache the pages of your blog.
- Minify. This setting allows you to easily reduce the size of your CSS and Javascript (JS) files by automatically removing unnecessary data from those files.
- Database Caching. Allows you to cache database queries to reduce post, page, and feed creation times.
- Content Delivery Network. If you use a CDN, such as S3, your can enable this option to use static files on your CDN host.
- Debugging. If you have issues, you can enable debugging for any of the above mentioned options to find out the problem. This will output information into the web page source, so you only want to enable this option when you have problems.
You can enable or disable the options you want to use. For example, if you don’t want database caching or don’t have a CDN, then you simply disable those options, but keep the page caching and minify enabled.
At the top of the “General Settings” page, there are links to individual settings pages where you fine tune how you want the plugin to cache your blog. There are many options to set within each cache setting page, but the default values also work very well.
If you have trouble, there is a FAQ link also at the top as well as a Support link beside it. I found the options pretty intuitive that I was easily able to understand what they were, so may will probably not have much difficulty modify the settings within the plugin as well.
Overall, I have been very happy with the plugin. Installation and setup was very easy, and all I needed to do was enable the settings that I wanted to use. If you are looking for a cache plugin for your WordPress blog, you would like to try an alternative to WP Super Cache, I recommend you try W3 Total Cache.
